
Routing only the selected wires instead of routing the full project is one of the most time-saving improvements in SOLIDWORKS Electrical 2026. This feature is perfect for large projects, modification work, and design updates where you don’t want to re-route the entire harness.

Why Use the Route Selected Wires Option
The Route Selected Wires option in SOLIDWORKS Electrical 2026 helps you save time, avoid unnecessary re-routing, and improve project efficiency. Instead of routing the entire project, you can route only the wires that changed. This makes the process faster, reduces system load, prevents changes to already-routed wires, and is ideal for troubleshooting or small design updates. It gives you better control, higher accuracy, and smoother workflow in large electrical assemblies.
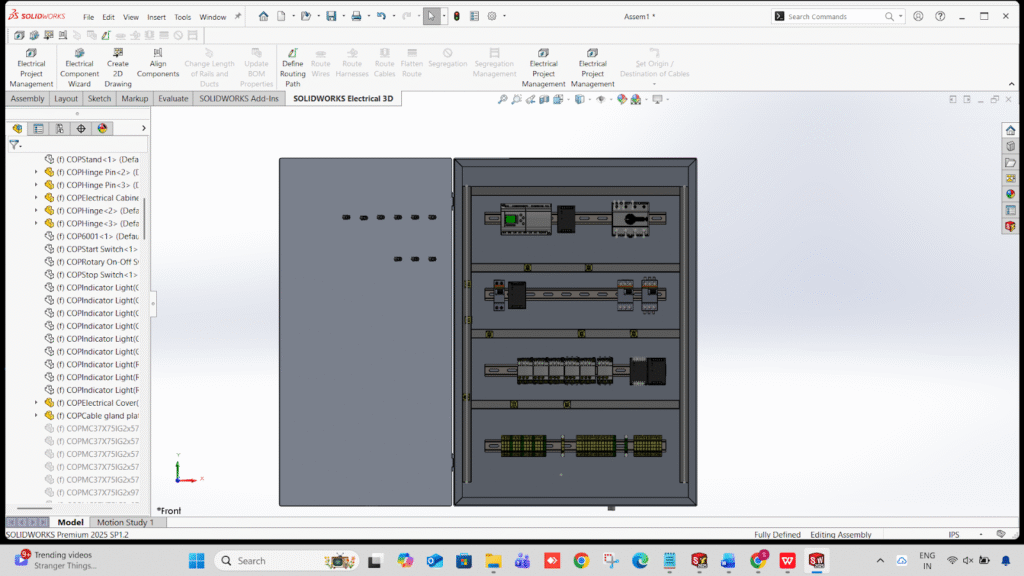
Open Your 3D Model
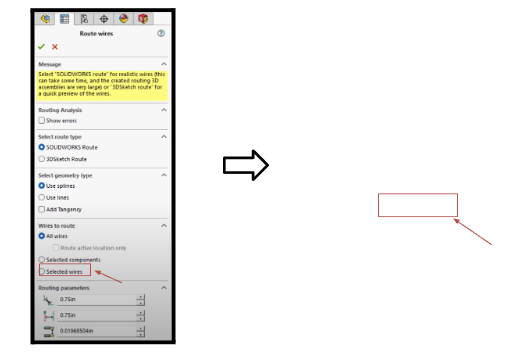
Go to → Electrical Command Manager → Route Wires
Enable the New Route Selected Wires Option In the routing dialog box, you will now see a new option:
Route only selected wires
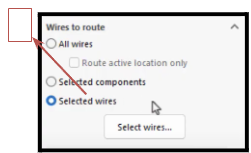
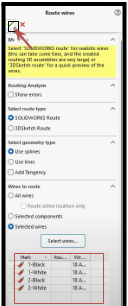
Select the Wires to Route
From 3D Assembly
- Click the components
- Select wire connections in the feature tree
- Choose the wires you want to route
From the 2D Schematic
- Open the wire list
- Select specific wires
- Right-click → Select wire in 3D

Run Routing
- Click OK / Run.
Verify Route Results
- Check the feature tree for new routes.
- Green → Successfully routed
- Yellow → Needs adjustment
- Red → Routing failed
Troubleshooting Tips
- Ensure all connection points have proper CPoints
- Check for closed paths in routing assemblies
- Avoid suppressed routing subassemblies
- For multi-core cables, select the core wires individually
Conclusion
The Route Selected Wires feature in SOLIDWORKS Electrical 2026 is a major time-saving improvement. With selective routing and faster updates, you can modify complex projects more efficiently.