Search

How to Create a 3DEXPERIENCE Dashboard: A Comprehensive Guide

3DEXPERIENCE Dashboard

The 3DEXPERIENCE platform empowers users with a powerful tool: dashboards. These customizable interfaces provide a centralized location to access resources and content relevant to your organization's activities. Imagine having all the information you need at your fingertips, organized to streamline your workflow. That's the magic of 3DEXPERIENCE dashboards.

This guide walks you through the process of creating and customizing dashboards, putting you in control of your 3DEXPERIENCE experience.

Getting Started with "My First Dashboard"

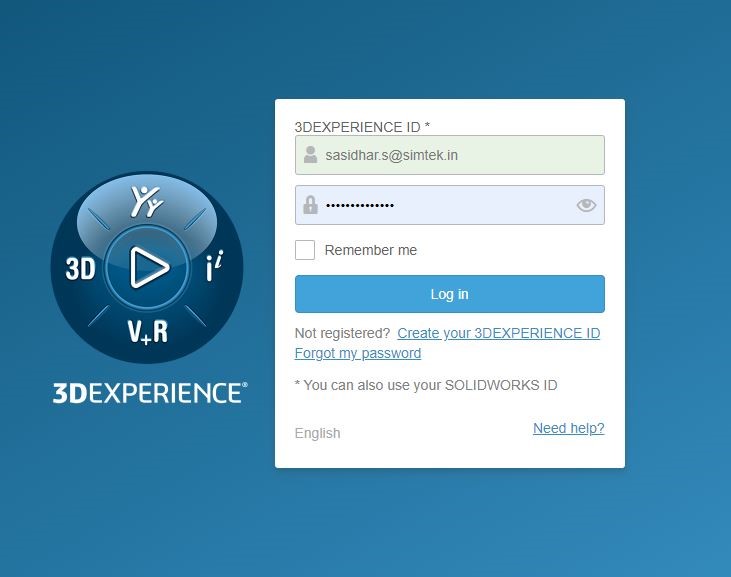
Upon logging into 3DEXPERIENCE for the first time, you'll encounter "My First Dashboard." This serves as your launchpad, featuring pre-populated tabs like "Getting Started" and "Learn the Experience." These tabs showcase available widgets and applications in action, giving you a taste of the platform's capabilities.

Creating a New Dashboard

Ready to personalize your experience? Let's dive into creating a new dashboard.

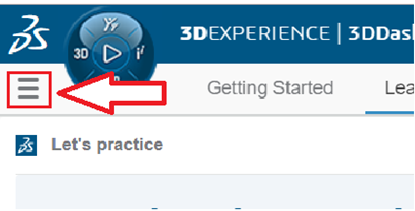
1. Locate the Dashboard Menu:

Navigate to the top left corner of the page, next to the Compass icon. Expand the "Dashboard and Cockpit Search" menu by clicking it.

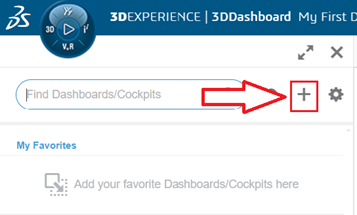
2. Initiate Dashboard Creation:

Click the plus sign (+) symbol displayed beside the search bar.

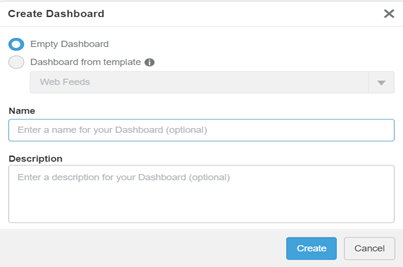
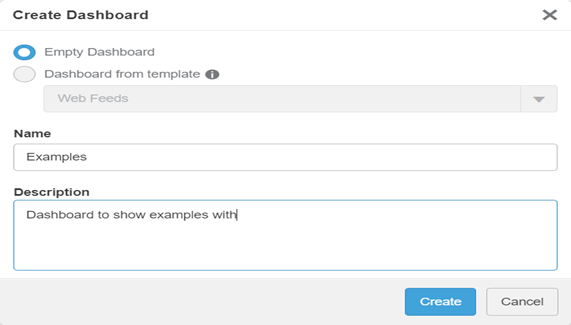
3. Choose Your Template (Optional)

The "Create Dashboard" menu appears. Here, you can choose between a blank dashboard or leverage a template to jumpstart the process. Template availability depends on your assigned roles. Provide a name for your dashboard and an optional description to personalize it further. Once satisfied, click "Create" to bring your new dashboard to life. For this example, let's create a blank dashboard named "Examples."

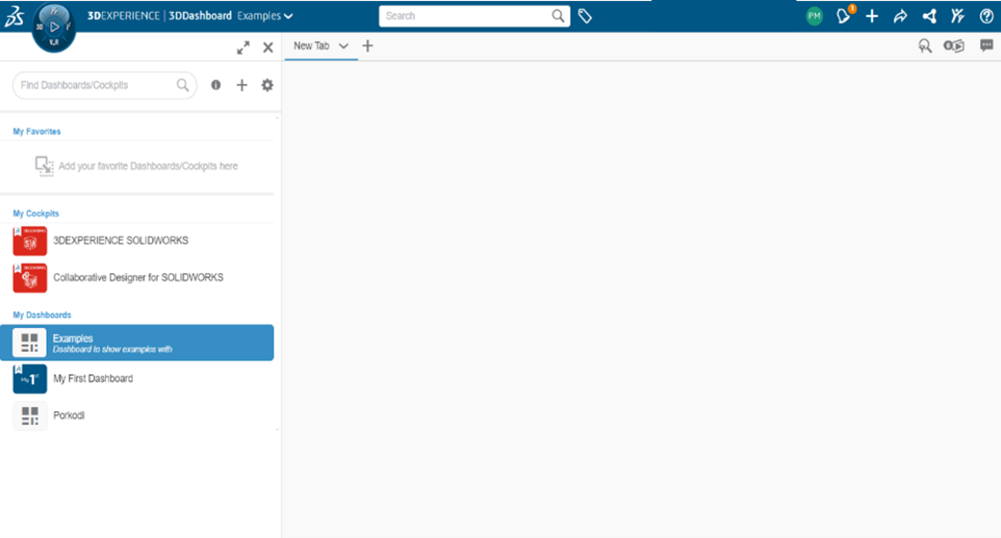
4. Your New Dashboard Appears:

The newly created dashboard will populate the main view and be added to your dashboard list.

Customizing Your Dashboard with Tabs

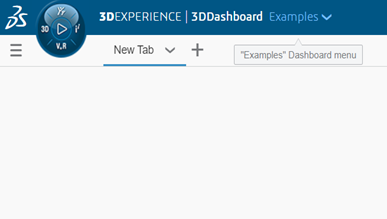
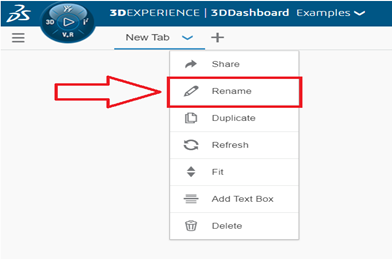
1. Welcome to the New Tab:

Upon creating a new dashboard, you'll land on a blank "New Tab." Rename this tab to reflect the tasks you intend to accomplish within this section.

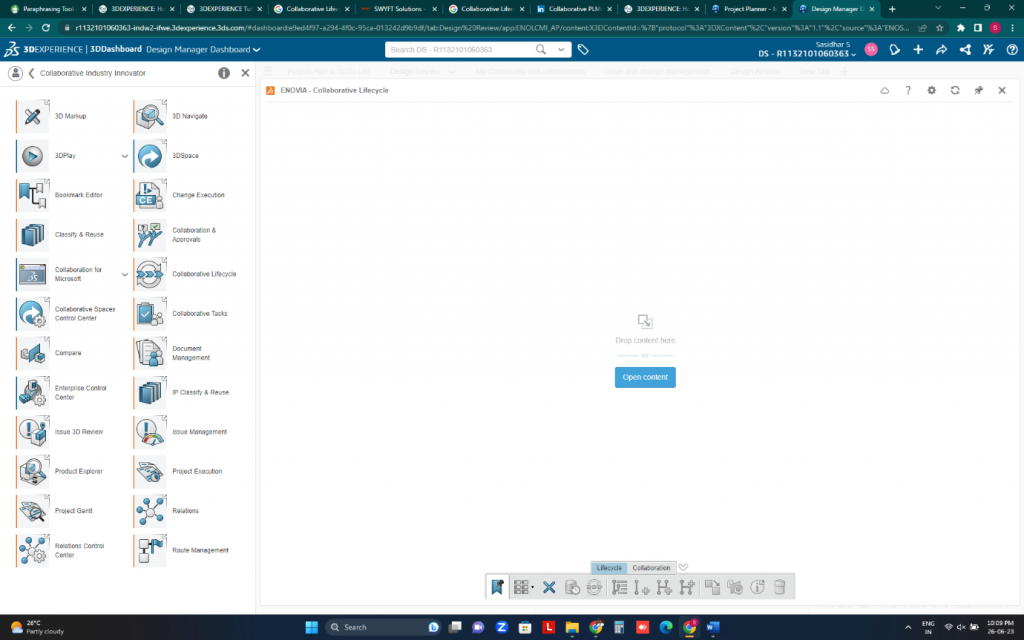
2. Explore Roles and Apps:

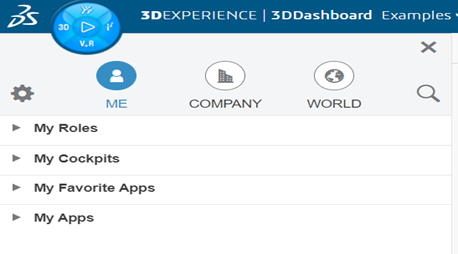
Click the 3DEXPERIENCE Compass icon to explore the available Roles and Apps within the platform.

3. Identify Task-Specific Apps:

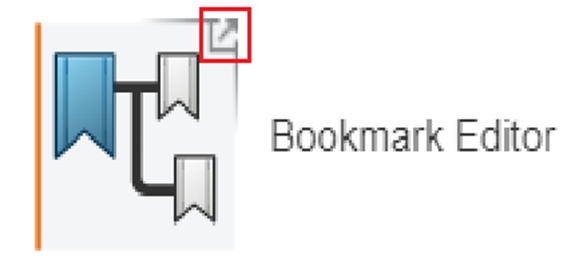
Locate the applications most relevant to your tasks. Widgets, identifiable by the arrow icon in their upper right corner, represent these applications.

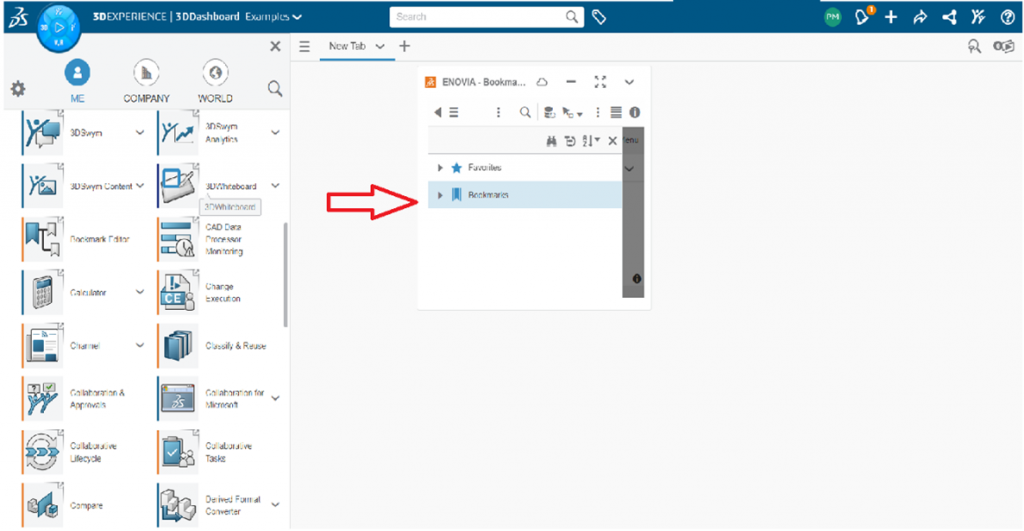
4. Drag and Drop for Seamless Integration:

Don't hesitate to add widgets to your tabs! Simply drag and drop any widget you require onto the designated page.

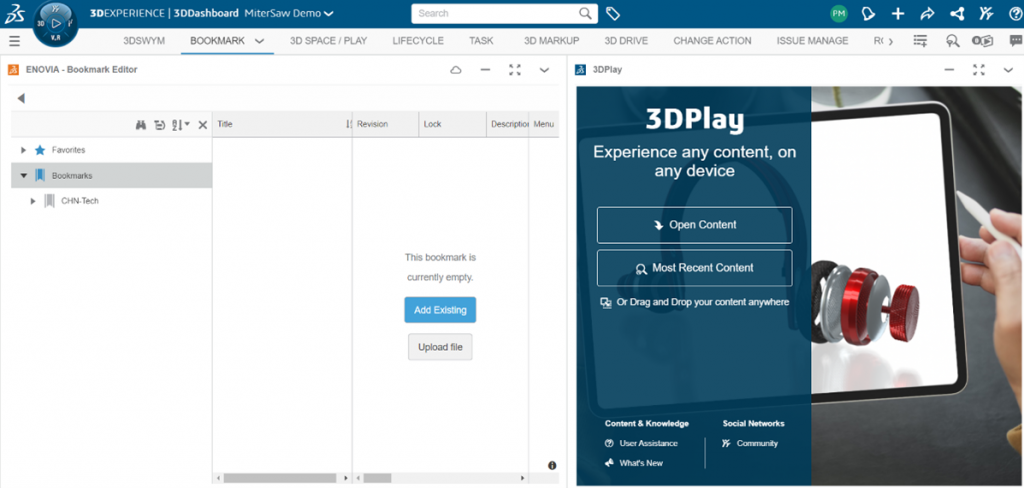
5. Snapping to the Grid:

As you drag and drop widgets, observe how they attempt to snap to specific locations within the viewport, ensuring a clean and organized layout.

6. Widget Resizing and Rearrangement:

Widgets are not limited to their default square size. Feel free to rearrange and resize them to fit your preferences.

This guide equips you with the knowledge to create and personalize dashboards and tabs within 3DEXPERIENCE. With these custom dashboards, you can streamline your workflow, gain instant access to crucial information, and ultimately boost your productivity.

How to utilize the 3DEXPERIENCE SOLIDWORKS 3DSwym

The 3DEXPERIENCE platform offers a powerful tool for collaboration and communication: 3DSwym. It empowers users to share ideas, spark discussions, and drive innovation within communities. This guide explores the various post types available in 3DSwym, equipping you to leverage its full potential.pen_spark

3DSWYM POSTS:

Share text-based content using 3DSwym's posts. Utilize the Rich Text Editor to format your message for clarity and impact. Additionally, categorize your posts with 6WTags for better organization. Furthermore, embed multimedia content to enhance understanding.

Engage Through Posts:

Take center stage with multimedia content using the 3D/Photo/Video post type. Upload directly to your SWYM community and don't worry if you lack pre-made media. Create presentations, tables, and drawings directly within this content type to support your message.

Showcase Visuals with 3D/Photo/Video:

Community ideas form the foundation for groundbreaking designs and advancements. These function similarly to articles, with an added advantage: users can evaluate and refine the concept. You can even customize the idea pipeline to match your existing workflows.

Ask and Answer with Questions:

Conduct surveys within your SWYM community to gather valuable insights. 3DSwym offers multiple answer formats, including rating scales, open-ended questions, and multiple choice. Results can be visualized in pie charts or downloaded as CSV files for further analysis.

Fuel Innovation with Ideas:

Wiki Pages serve as editable online resources for storing and sharing information within a community. Maintain a glossary of industry terms, provide quick access to crucial company documents, or leverage rich text formatting and embedded media for effective information presentation. Wikis can be nested for a structured hierarchy, and locked once finalized to prevent unauthorized changes.

Make Decisions with Surveys:

WeDos provide a space to assign simple tasks to community members or colleagues during discussions. They function alongside the Project Planning widget for enhanced capabilities. Add an optional title and description for further context. Leveraging your SWYM Community, you can assign WeDos to up to ten participants, each receiving relevant materials and deadlines based on their user credentials.

Organize Knowledge with Wiki Pages:

3DSwym unlocks a world of possibilities for collaborative communication within the 3DEXPERIENCE platform. By mastering the various post types, you can share knowledge, spark discussions, and drive innovation within your teams. Start exploring 3DSwym today and unlock the full potential of collaborative creation!

Assign Tasks with WeDos:

WeDos provide a space to assign simple tasks to community members or colleagues during discussions. They function alongside the Project Planning widget for enhanced capabilities. Add an optional title and description for further context. Leveraging your SWYM Community, you can assign WeDos to up to ten participants. Each participant will then receive relevant materials and deadlines based on their user credentials.

Empower Your Collaboration

Unleash the power of collaborative communication within the 3DEXPERIENCE platform with 3DSwym. By mastering its various post types, you can effortlessly share knowledge, spark engaging discussions, and ultimately drive innovation within your teams. Therefore, start exploring 3DSwym today and unlock the full potential of collaborative creation!

SolidWorks Simulation: Design Stronger, Safer Industrial Equipment

We have just wrapped up another successful webinar and are thrilled about the positive feedback that
we’ve received. The focus of this live webinar addressed the unique issues of industrial equipment
design. It showed how to use both SOLIDWORKS 3D modeling and cloud-based 3DEXPERIENCE Works®
Industrial equipment manufacturers face a unique set of design challenges. Today's machines are becoming increasingly complex, with intricate electromechanical systems and large assemblies that can slow down the 3D CAD development process.

Traditional physical prototypes are often expensive and time-consuming to create, further hindering efficient design iterations.

solidworks - Traditional physical prototypes

Overcoming Industrial Equipment Design Issues

To stay competitive in a rapidly evolving market, manufacturers are embracing automation and specialized tools to achieve greater productivity and flexibility.

This is where SOLIDWORKS® 3DEXPERIENCE Works Simulation (3DEXPERIENCE Works Simulation, not SOLIDWORKS itself, should be the keyphrase in the title for SEO) comes in.

This cloud-based platform offers a powerful combination of 3D modeling and simulation (often referred to as MODSIM) that can help you address critical industrial equipment design issues, including:

Customization and Adaptability:

Industrial equipment needs often vary depending on specific customer requirements or unique processes. 3DEXPERIENCE Works Simulation empowers you to design equipment that is adaptable and customizable, meeting these diverse needs while maintaining efficiency and cost-effectiveness.

Durability and Reliability:

Industrial environments are often harsh, with extreme temperatures, vibration, dust, and corrosion being common factors. 3DEXPERIENCE Works Simulation allows you to virtually test your designs under these conditions, ensuring they are durable and reliable, minimizing downtime for maintenance or repairs.

Technological Advancements in Soliworks:

The industrial landscape is constantly evolving with advancements in automation, robotics, AI, and IoT. 3DEXPERIENCE Works Simulation helps you stay ahead of the curve by incorporating these innovations into your designs, meeting ever-changing customer expectations.pen_spark

Cost-Effectiveness:

Balancing advanced features and high-quality materials with cost control is a constant challenge for manufacturers. 3DEXPERIENCE Works Simulation allows you to optimize designs for cost-effectiveness without compromising on performance, durability, or efficiency.pen_spark

Safety and Compliance:

Stringent safety standards and regulations govern industrial equipment. 3DEXPERIENCE Works Simulation helps ensure your designs meet these safety requirements and comply with various regulations, streamlining the compliance process.

Unlocking the Power of MODSIM

By leveraging the collaborative cloud environment of 3DEXPERIENCE Works Simulation, you gain valuable insights from embedded simulation solutions. This allows you to analyze factors like strength, durability, thermal comfort, flow, manufacturability, and electromagnetic performance throughout the design process. This digital prediction of real-world behavior empowers you to make informed decisions at every stage, potentially reducing (or even eliminating) the need for physical prototypes and ultimately leading to higher quality industrial equipment.

Gain insights on SOLIDWORKS-embedded simulation solutions while enhancing strength

Watch the Recorded Webinar

Gain insights on SOLIDWORKS-embedded simulation solutions while enhancing strength, durability,
thermal comfort, flow, manufacturability, and electromagnetic performance within a collaborative cloud
environment. The MODSIM approach to product development empowers you to make improvements at
each phase of the design by predicting real-world behavior digitally, where you can help decrease (and
sometimes eliminate) the need for prototypes and increase all aspects of product quality.

Conclusion

3DEXPERIENCE Works Simulation offers a powerful and cost-effective solution for industrial equipment manufacturers. This innovative platform allows you to overcome design challenges, optimize equipment performance, and ultimately deliver stronger, safer, smarter, and more comfortable industrial equipment to your customers.

Collaborative Lifecycle Management :How to access the Collaborative Lifecycle role in order to build revision management

Imagine a world where managing revisions for your 3D projects is a breeze. No more confusion over version numbers or lost updates. This is the power of Collaborative Lifecycle Management (CLM) within the Open 3D Experience Platform. CLM empowers you to track changes, create branches, and effortlessly merge revisions, all while fostering seamless collaboration throughout your design process.

Harnessing the Power of Collaborative Lifecycle Management:

The Open 3D Experience Platform offers a robust set of tools accessible through Google Chrome. By leveraging your 3D Passport credentials, you can unlock the full potential of CLM. Here's a step-by-step guide to get you started:

1. Access the Collaborative Industry Innovator Role:

Upon logging in, navigate to the Compass icon. This will grant you access to the Collaborative Industry Innovator role, where you'll find the CLM app.

2. Launch the Collaborative Lifecycle App:

Double-clicking the CLM app icon will launch it within the platform.

3. Open Your Model and Initiate Revisions:

Select your desired model within the 3D space and open it within the CLM interface. This will initiate a new conversation for the updated revision.

4. Provide Revision Details:

This is where you can clearly document any changes made to the model. A detailed revision history is key for maintaining transparency and efficient collaboration.

5. Finalize the Revision:

Once you've documented the revision details, simply click "Revise" to commit the changes and update the file revision.

Beyond the Basics: Unlocking the Full Potential of CLM

While the above steps provide a foundational understanding of CLM, its capabilities extend far beyond basic revision control. This powerful tool allows you to:

  • Create and Manage Branches: Facilitate parallel development by creating separate branches for different design iterations. This enables exploration of alternative concepts without jeopardizing the core model.
  • Effortless Merging: Seamlessly integrate changes from various branches back into the main model, ensuring all team members are working with the most up-to-date version.
  • Enhanced Collaboration: CLM fosters a collaborative environment by providing a clear historical record of changes, revisions, and contributors. This promotes transparency and streamlines communication within your design team.

Conclusion

By incorporating Collaborative Lifecycle Management into your workflow, you can revolutionize the way you manage revisions and propel your 3D design projects to new heights. With its intuitive interface and comprehensive features, CLM empowers you to maintain control, streamline collaboration, and unlock the full potential of your design vision.

3DEXPERIENCE Exchange – Import and Export Package

3DEXPERIENCE Exchange

Let us see how we can Import and Export Package with 3DEXPERIENCE Exchange.

Collaborating together with users outside of your company has always been better! Assembly files can be easily bundled into a single package file by using the Export as a Package capability. You can share this file with third-party suppliers so you can track and get back their modifications. Even the files that are editable within the package can be restricted.

Similar to SOLIDWORKS Pack and Go, but with more ease of use as well as integration with 3DEXPERIENCE Platform products, is this capability.

How to Export as Package:

1. In 3DEXPERINCE SOLIDWORKS, open the assembly file you would like to share with External Stack Holder.

2. To save, pick Tools from the 3DEXPERIENCE tab on the right, choose Export, and then select Export as Package.

pick Tools from the 3DEXPERIENCE tab on the right

3. On the launch of the export window, you have the option to mark assemblies and components as read-only or editable for whoever you are sharing data with

4. Following that, providing the package a name and choose Export. The 3DEXPERIENCE Platform permits you to save the package file (.sldpkg) locally or to 3DDrive.

the package a name and choose Export

How to Import as Package with 3DEXPERIENCE Exchange for SOLIDWORKS:

1. Initially ensure certain SOLIDWORKS' "3DEXPERIENCE Exchange" Add-in is activated.

Initially ensure certain SOLIDWORKS' "3DEXPERIENCE Exchange" Add-in is activated.

2. Select the 3DEXPERIENCE Exchange tab on task plane, then pick Import Package.

3. To open the ".sldpkg" file that you received, click the "Open" icon in the "Import Package" Window. A working folder will be created when importing this package, and its default path will be taken automatically.

 To open the ".sldpkg" file that you received, click the "Open" icon in the "Import Package" Window. A working folder will be created when importing this package, and its default path will be taken automatically

4. The window on the right will display the files that are read-only or unchanged when the package has been imported.

The window on the right will display the files that are read-only or unchanged when the package has been imported

5. The window on the right will display the files that are read-only or unchanged when the package has been imported.

Export Package:

Once you've decided to send the updated package back to the the sender, select Package, Export. The revised ".sldpkg" file can be saved from here on and forwarded to the 3DEXPERIENCE user you are collaborating with.

Back to Top
Product has been added to your cart