Introduction
Creating a high-quality image of a product using Solidworks composer.
After creating an image, you can follow a few steps to transform it into different types of images and ultimately use it to create a video
STEP 1
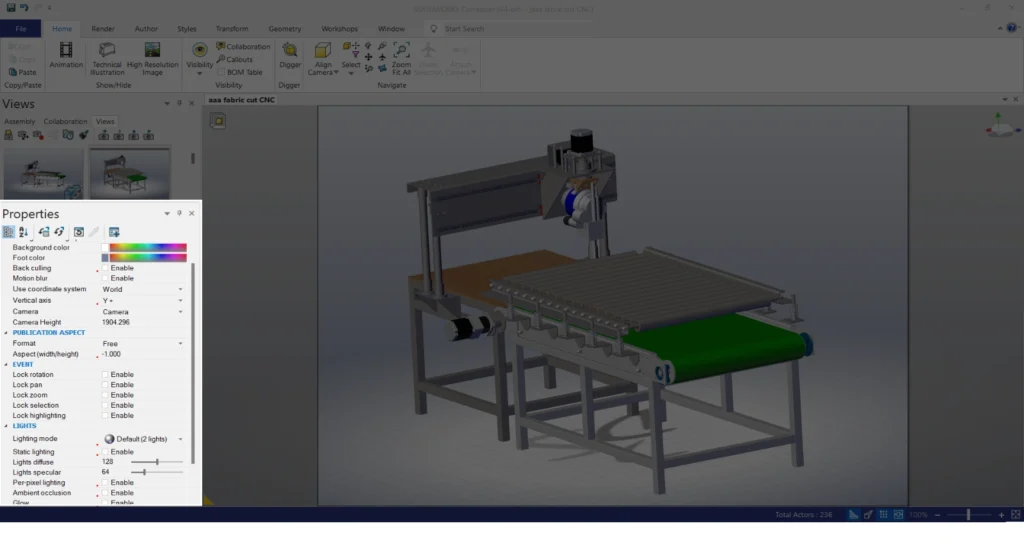
- As shown in the below image,
- You directly import a SOLIDWORKS assembly file.
- The left side bottom tab consists of various properties used to change the colors, background colors, camera alignment and a few other options to change the product looks.
- At the top, you’ll find additional options that provide various features we’ll explore in the following pages.
STEP 2
Assembly, Collaboration, Views
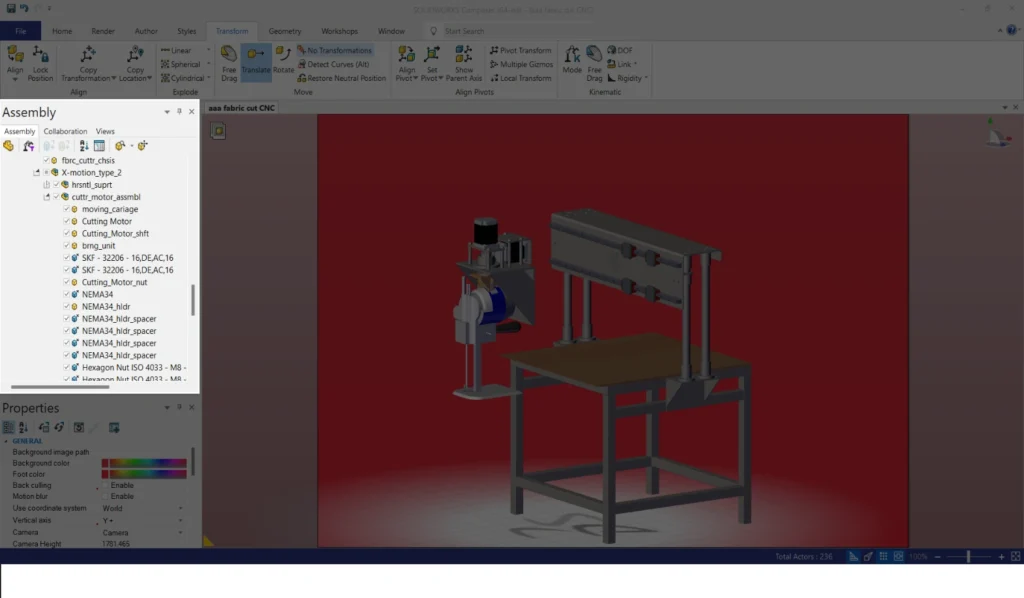
- Once the above points are done, as per the below image
- Three tabs (highlighted) will be present which consist of assembly, collaboration, and views.
- In the Assembly option every subassembly can be selected and modified separately. In the model, the selected subassembly will be highlighted in the assembly tab in a shaded brown color as shown in the image.
- Once selected we can hide others and work on the selected subassembly, or we can hide the selected subassembly and work on the other subassembly file.
- The VIEW tab allows you to take screenshots. Will discuss about VIEW tab in upcoming topics.
STEP 3
TRIAD
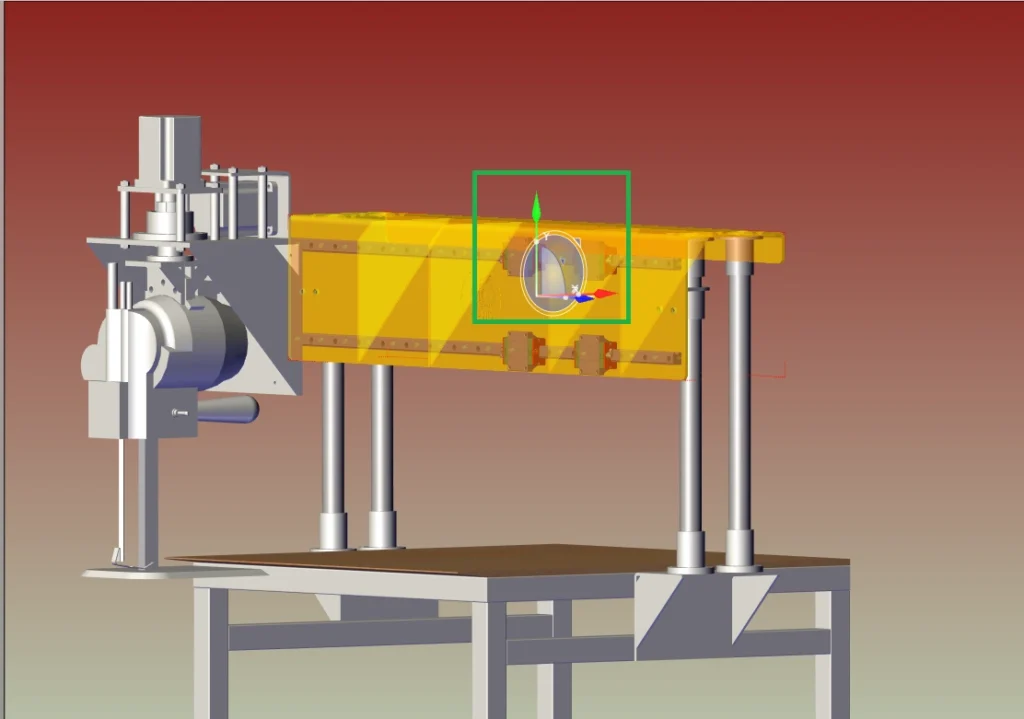
- A TIRAD option is to pull out the subassembly in any direction.
- The image shows bolts selected.. Once selected, the left side tab shows the selected bolts with highlighted shaded brown color.
- The software opens a pop-up with three colored triads for moving the selection.
- Every color represents the XYZ directions. Selecting and dragging the colored triads will cause the subassembly file to move in that direction.
STEP 4
PATH
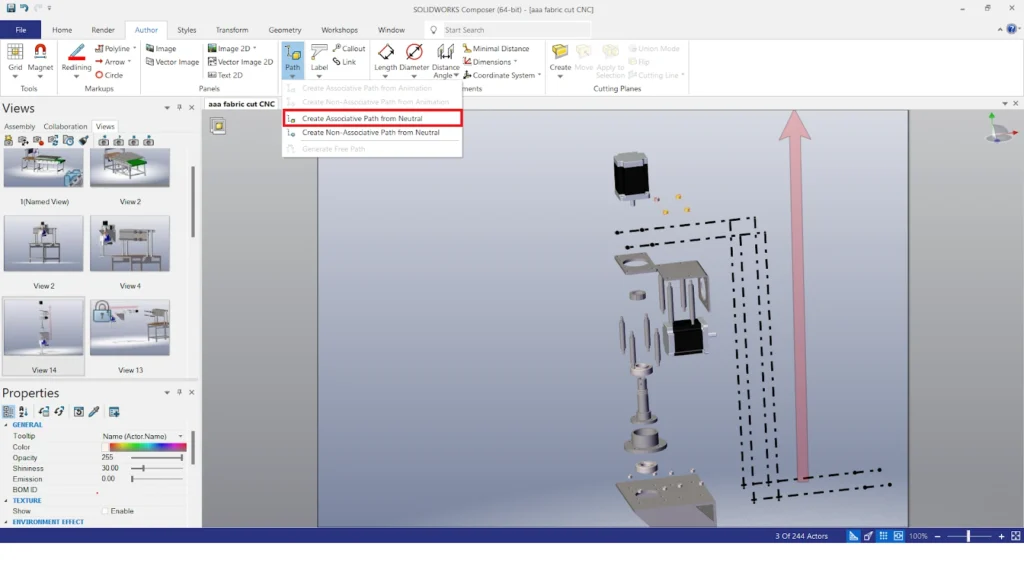
- SOLIDWORKS Composer allows you to create an associative path using the “Create Associative Path from Neutral” tool.
- A second image is the resulting image which shows where the removed bolt comes from i.e. neutral path.
- With this option even in exploded view we find the origin of the removed items.
STEP 5
LINEAR DRAG
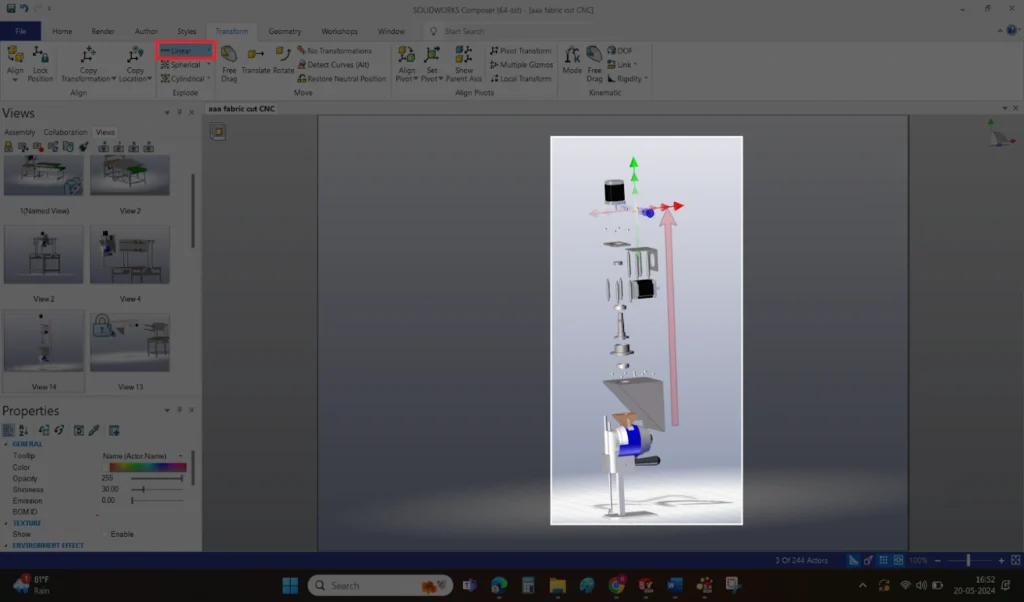
- Linear drag allows you to drag multiple subassembly files simultaneously.
- The only thing is that subassembly should be either vertical or horizontal.
- Selecting subassembly files vertically or horizontally is necessary to maintain their removal process.
STEP 6
VIEWS
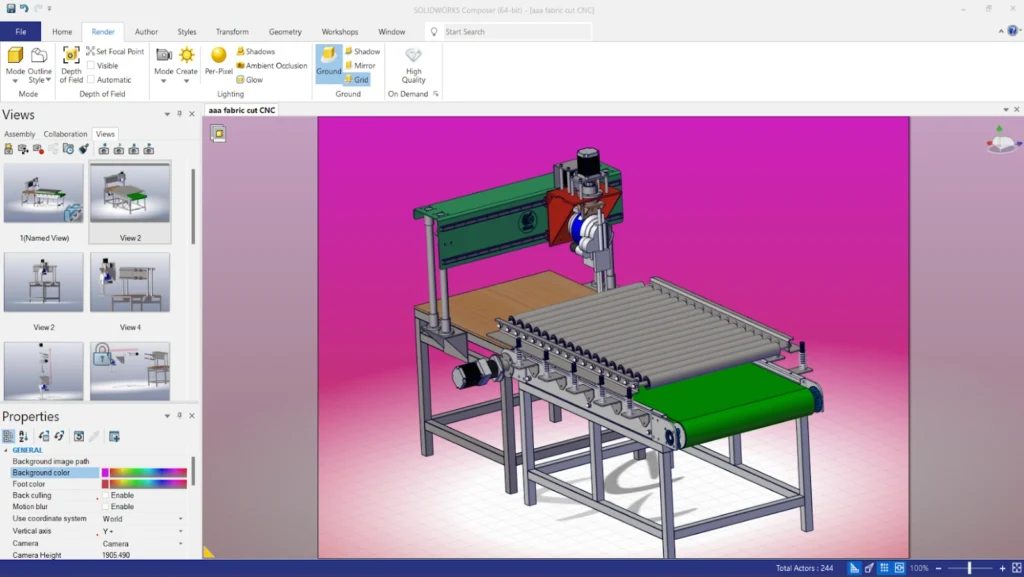
- The VIEWS tab allows you to capture a screenshot, which can then be used to create videos.
- Those videos show how to assemble the product and how to remove it at the same.
- Every view will be different and showcase the process of the product assembling.
- We will cover how to add various effects to views, including exploding parts, highlighting elements, zooming in for detail, and using diggers for interactive exploration..
STEP 7
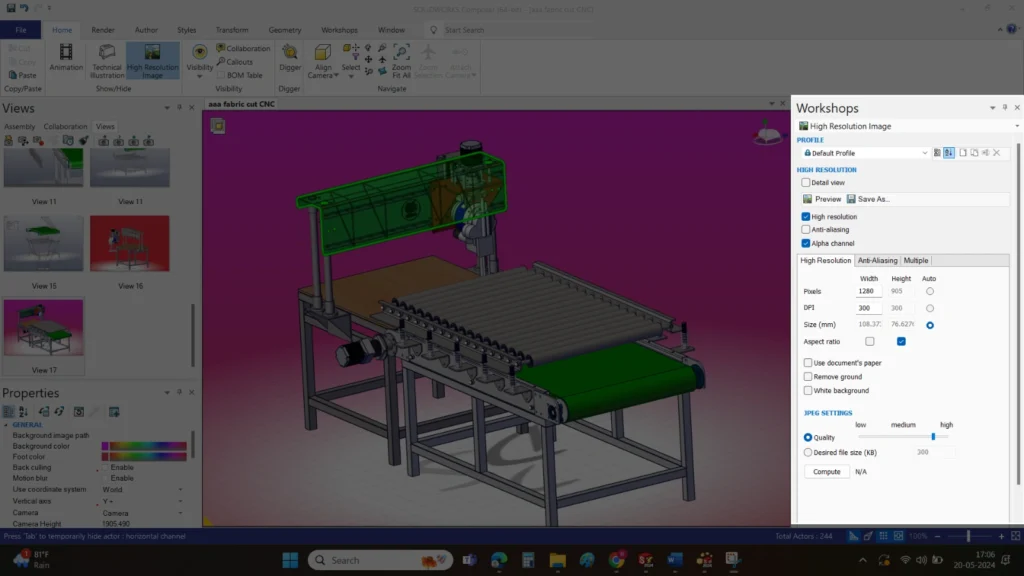
HIGH RESOLUTION IMAGE
- With high resolution image option under the tab Home, A workshops opened at the right side.
- A multiple options will be available like preview, Detail view, background options etc…are selected and saved according to requirements.

Summary
- With these above-mentioned points we can be able to create high-quality images (VIEWS) using SOLIDWORKS COMPOSER
- We will cover video creation and other topics in the next session.

