A route template is a set of predetermined tasks that you can use repeatedly. Unlike creating a new route from scratch, using a template means that you do not have to perform a setup every time you need a new route.
It is possible to create multiple different route templates. This enables you to define and capture an array of different processes within the business or department.
ROUTE TEMPLATE TYPES
1. Approve
The assignee must approve the work that is associated with the task, whether it is a design or a document.
2. Notify only
Whoever is assigned to a task as Notify Only receives a notification about the task.
3. Comment
The task assignee must add a comment to complete the task. This is usually to provide additional insights or information for those who later approve the work that is tied to the sequence of tasks.
How to Create Route Template
Use the Route Management widget to create route templates. As an example, this document sets up a basic route template for creating, reviewing and approving a new design.
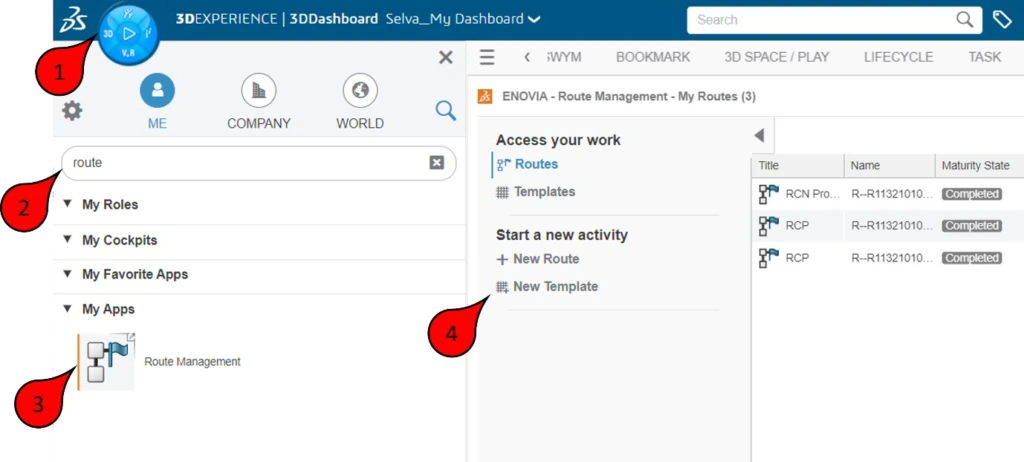
1. Launch Route management application in the compass to create a route template, in the Start a new activity section, click New Template.
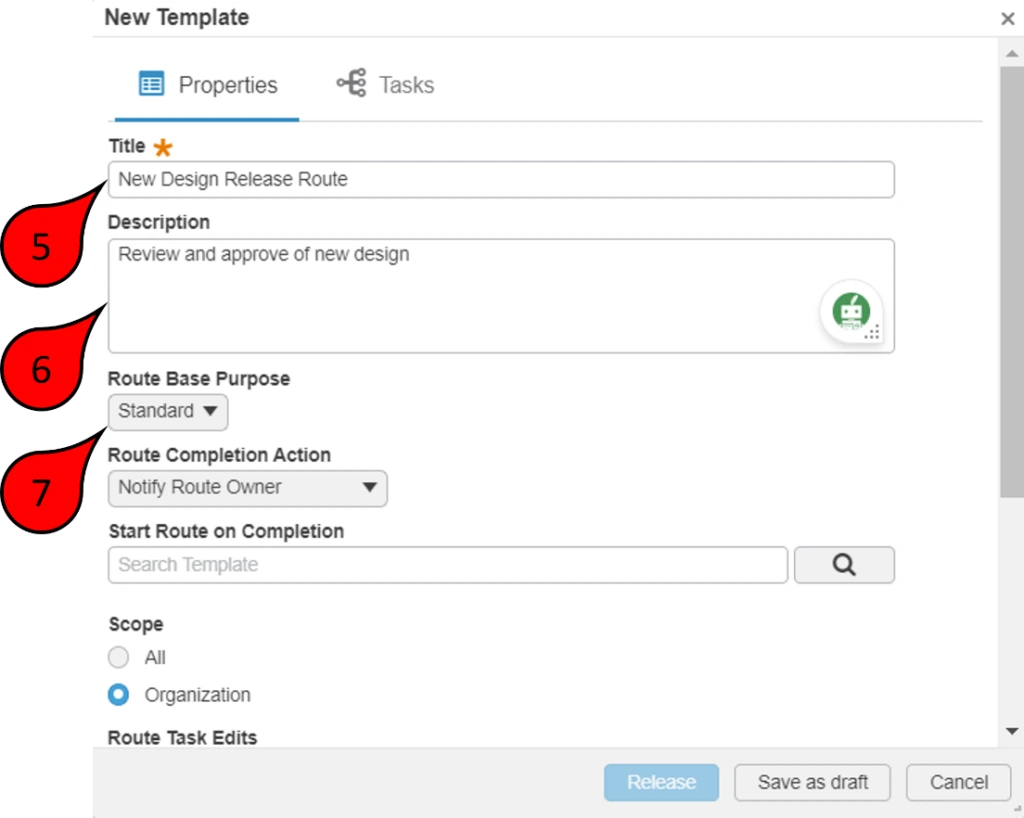
2. In the Properties dialog box that appears, enter a title for the route template and add a description that explains the purpose of the route. Because the template will have three different tasks, of which the Expected Action option for two tasks specifies Comment and for one task specifies Approve, the Route Base Purpose option specifies Standard. A Standard route template can contain several different types of tasks (Approval, Comment or Notify Only).
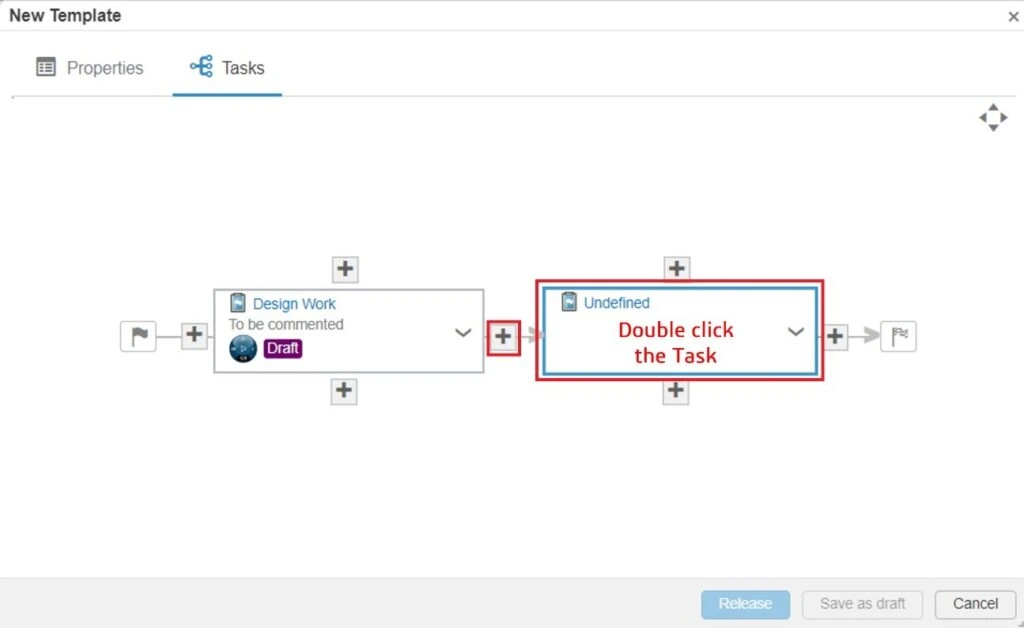
3. To add tasks to the route, click the Tasks tab. Then click Add Task.
4. The creates a task in the route. You must double-click the route to provide a definition.

5. Add a title for the task, define the Expected Action option as Comment, and then add a description.

6. Scroll down and in the Assignee field, specify the Member of the platform that performs the design work. To apply the information and finish setting up the task, click Apply.

7. To add additional tasks, click the plus (+) icon at the right of the task just created to add another task after the first, then double- click the new task to open the properties pane.
8. In the properties pane, add a title and description, and ensure that the Expected Action option specifies Comment.

9. Scroll down the dialog box and define the assignee for the task, then click Apply.
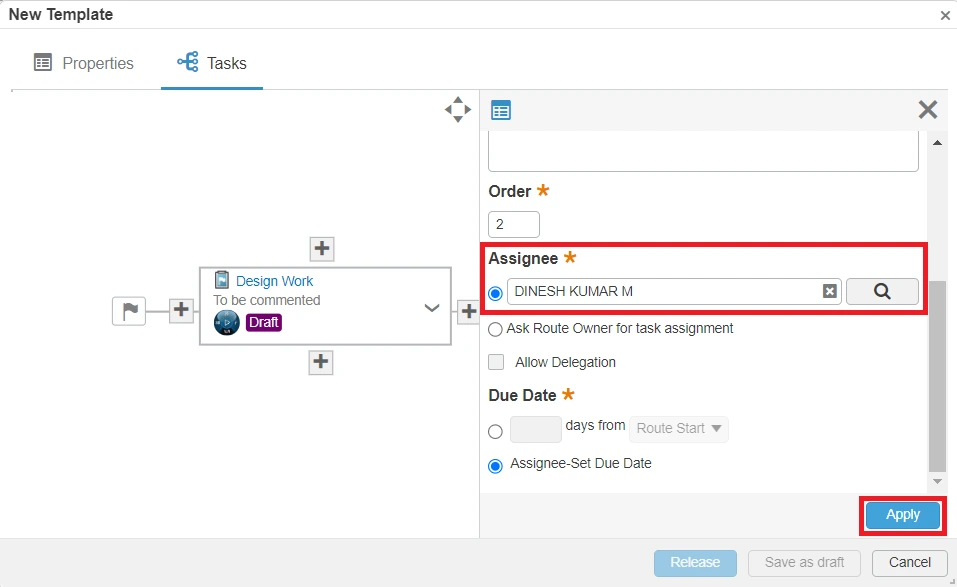
10. Once again, the click the + icon at the right of the Design Review task to create an additional task, access the task properties and enter a title and a description for the task.
11. The Expected Action option for this task is Approve because it is the final task in the route and the Assignee.

12. Scroll down the dialog box and define the assignee for the task, then click Apply.

13. We have now created a route that consists of three serial tasks. The final step to make this route template available for use is to click Release to activate the route.

Parallel Task Template
1. It is possible to create parallel tasks. To do this, click the + icon above or below the task that should have two or more assignees.

2. After setting up two or more parallel tasks, it is possible to select whether All or Any of the assignees of the task need to approve or comment for the route to progress.

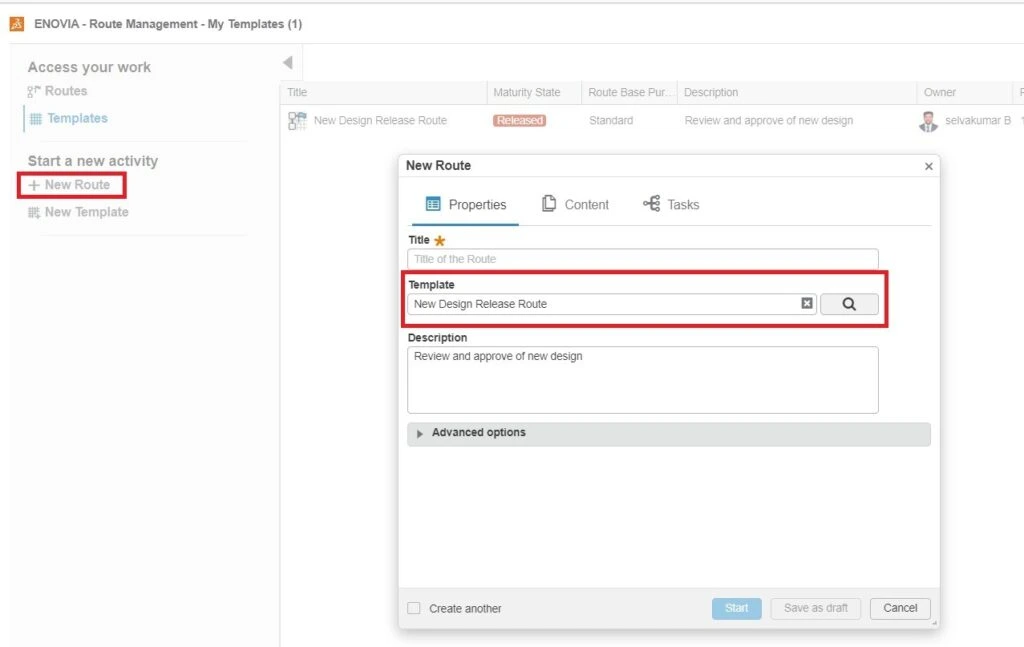
3. The final step to make this route template available for use is to click Release to activate the route. The Released templates are available in the Template Tab.

Templates can be used in the new route tab and search Template for use it.
Route Templates in 3DEXPERIENCE, Route Templates in 3DEXPERIENCE
