

The world of product development is constantly evolving, and innovative tools like 3D Product Architect (PAU) are pushing the boundaries of Solidworks. This powerful software empowers users to create and modify complex product structures without the need for dedicated design software. This translates to a more inclusive development process, allowing even non-designers to contribute to product visualization and refinement. With 3D PAU, digital mockups become a breeze, fostering earlier collaboration and reducing the number of design iterations required. Let’s delve deeper and explore the exciting functionalities of 3D PAU and how it can streamline your product development journey.
PREDEFINED VIEW
The predefined view in SOLIDWORKS is the easier way to set up the
orientation of our models like the front view, top view, right view, and an
isometric view. Additionally, configure the model dimensions, display style,
and scale.
Streamline Drawing Creation with Predefined Views
Predefined views are a built-in feature in popular Computer-Aided Design (CAD) software like SolidWorks. They offer a faster and more efficient way to generate standard views of your 3D models, such as front, top, and right side views.
This blog dives into how you can leverage predefined views to create drawing templates, saving you significant time and effort in the long run.
Building Your Predefined View Template
The core of this technique lies in creating a template that incorporates your preferred view orientations, dimensions, and annotations. Here, we’ll walk you through the steps involved in building your own predefined view template:
- Choosing the Right Template and Sheet Size: We’ll discuss selecting the appropriate base template and sheet size for your drawings.
- Inserting Predefined Views: Learn how to easily insert standard views like front, top, and right side views using the predefined view options.
- Customizing Annotations and Dimensions: Explore the options for setting annotations and dimensions within your predefined views.
- Saving Your Template: Discover how to save your customized template for future use.
Benefits of Predefined View Templates
By investing time in creating predefined view templates, you’ll reap numerous benefits:
- Increased Efficiency: Significantly reduce the time spent on setting up basic views in your drawings.
- Standardized Drawings: Ensure consistent layout and presentation across all your drawings.
- Reduced Errors: Minimize the risk of errors by pre-defining critical annotations and dimensions.
Leverage Predefined Views for a Smoother Workflow
Predefined views offer a powerful approach to creating drawing templates in SolidWorks. implementing this technique, you can significantly boost your productivity and ensure consistent, high-quality drawings for your projects.
CREATING A PREDEFINED VIEW
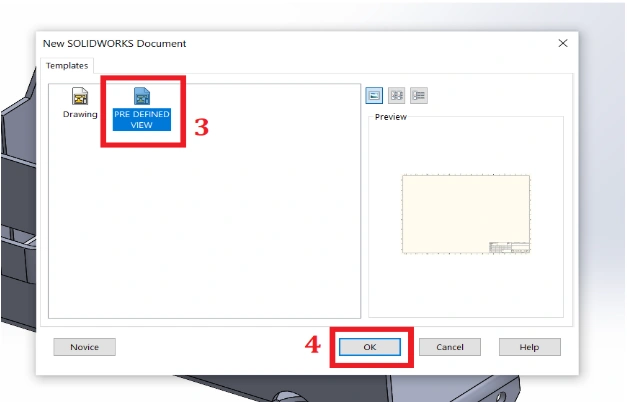
STEP-1: Choosing drawing template and sheet size.
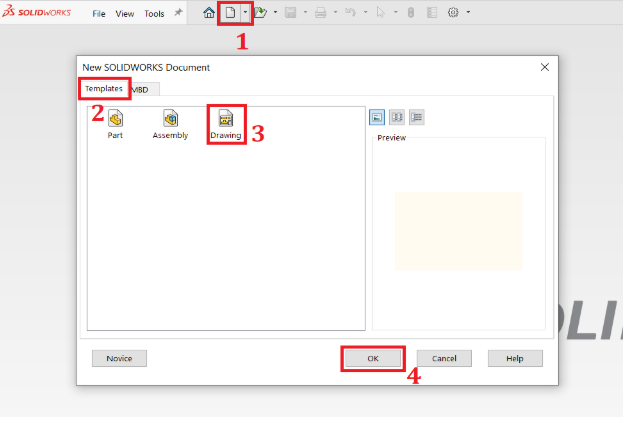
➢ Click New > Template > Drawing > Click OK.
➢ Select the sheet size > Click OK.
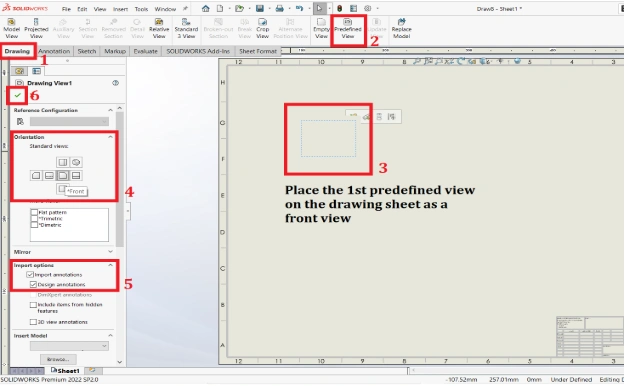
STEP-2: Placing the predefined views on the drawing sheet.
➢ In the command manager, click Drawing > Choose a predetermined
view.
➢Begin by placing the first predefined view onto the drawing sheet.
➢ Select the front view as the orientation on the property manager tab.
➢ Set the annotation on the property management tab and choose import
and design annotations from the drop-down menus.
➢ Set the first view by clicking OK.
Note: The same procedures apply for the top view and right-side views as
well.
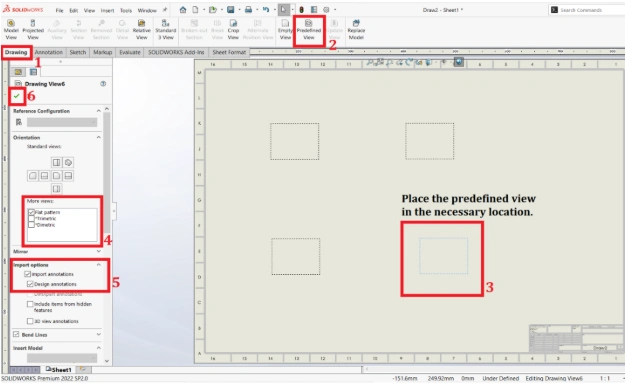
STEP-3: Placing the flat pattern views on the drawing sheet.
➢ In the command manager, click Drawing > Choose a predetermined
view.
➢ Place the predefined view in the necessary location on the drawing
sheet.
➢ Select the flat pattern view as the orientation on the property manager
tab.
➢ Set the annotation on the property management tab and choose import
and design annotations from the drop-down menus.
➢ Set the view by clicking OK.
Note: In SOLIDWORKS 2022 version new features include the flat pattern
view, dimetric views, and trimetric views.
STEP-4: Set the marked dimension for drawing.
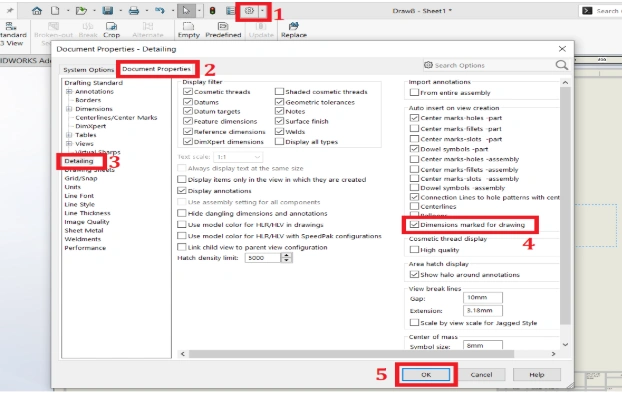
➢Select the document properties option on the settings menu.
➢In the document properties drop-down select detailing.
➢ The dimensions marked for drawing should be turned on.
➢ To make the selection, click OK.
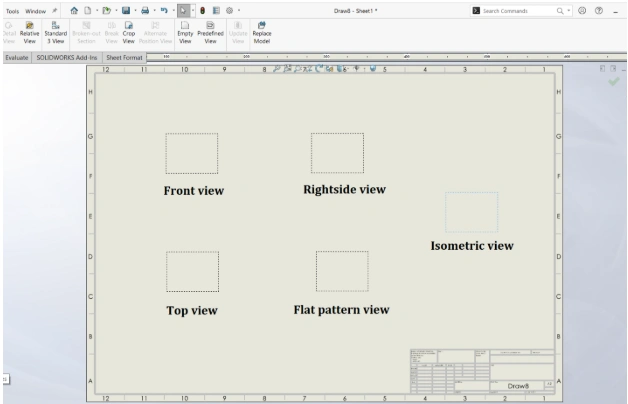
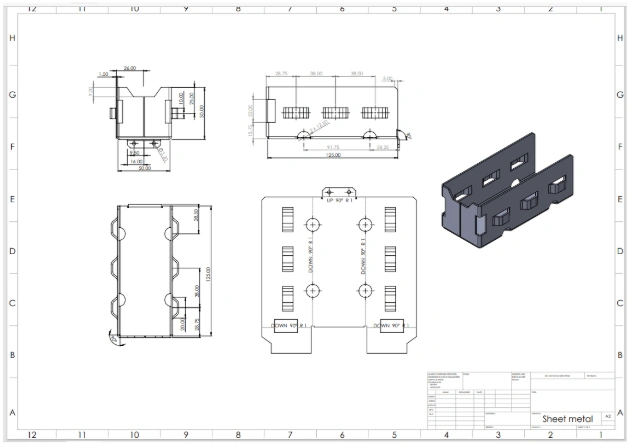
STEP-5: Review the final position of the predefined view
STEP-6: Save the predefined view as a template.
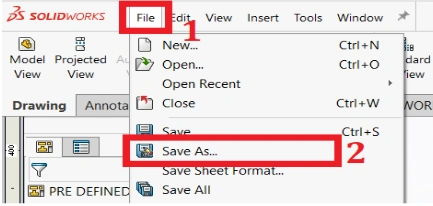
➢Click File > Save As.
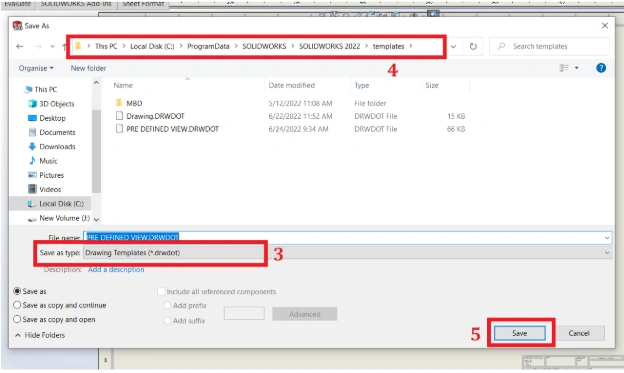
➢ Save as type pick a drawing template from the drop-down menu.
➢ If the drawing template is selected as the save as type, it transports to
the location of the pre-set template.
➢ Click OK to save the template
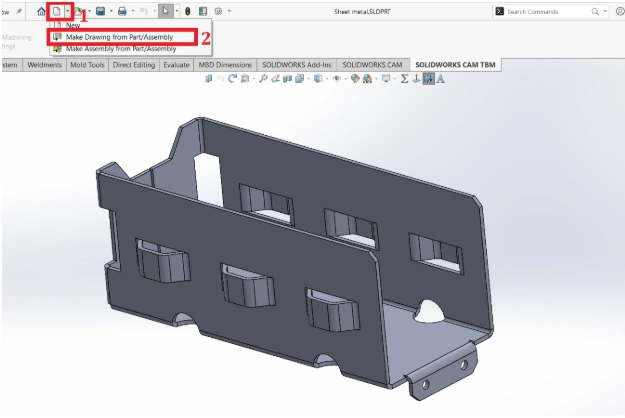
STEP-7: Create a drawing of the model.
➢Open the part > select the drop-down on a new tab.
➢ Choose mark drawing from part.
➢ Pick the created predefined view.
➢Click OK to see the model detailing.
Final Result:
Note: The predefined view template was also used in the task scheduler to
increase productivity. Click Here for More Information.
Conclusion:
Using Predefined Views to build templates is an excellent method to
automate projected or regular views and make the most of your Solidworks
tools. To work smarter rather than harder, try incorporating Predefined views
into your workflow.