
The Property Tab Builder is a stand-alone utility for creating a customized interface for adding properties to SOLIDWORKS Parts, Drawings, and Assemblies.
Custom Property tab builder is an easy way to enter information to our Parts, Assemblies and Drawings.
File Types:
You can use multiple property tab builder template for each document type. The file extension indicates the template type
| S.No. | Template Type | Description |
| 1 | . prtprp | Part |
| 2 | . asmprp | Assembly |
| 3 | . drwprp | Drawings |
| 4 | . wldprp | Weldment |
Example of creating Property Tab Builder:
We have to give these properties to a file.
• Description
• Number
• Material
• Weight
• Drawn By
• Checked By
• Checked Date
• Approved By
• Finish
• Type
Recognizing the Components :
❖Group box: To put the other items in groups, the Group box is effectively a container.
For example, you can place part information such as Part Numbers, Article Numbers, and Descriptions into a Group box and material information like Material, Finish, and Weight into another Group box. Each Group box can have a name.
➢ Textbox: This object keeps text as an associated property and allows users to enter free-form text. ➢ List: List boxes present users with a list of predefined values that once selected will be stored as a property. ➢ Number: A number box accepts only numeric inputs to store as a property.
➢ Checkbox: With a checkbox you can have the user select between two predefined values to place as a property.
➢ Radio: Radio buttons allow you to define a selection of up to three predefined values that can be used to show or hide elements in the dialog. As an example, you might want different text boxes to show based on the selected radio button.
Starting the Property Tab Builder:
For this example, I am going to build a simple tab for Assembly.
Go to the task pane on the right side of SolidWorks after creating any new file to start constructing the property tab. The spot to establish the property tab is on the very last tab.

Image 1: Property Tab Builder

Image 2: Create a New Property Tab Builder.
The new Application window called Property Tab Builder Will Pop-up as shown in Image 3.
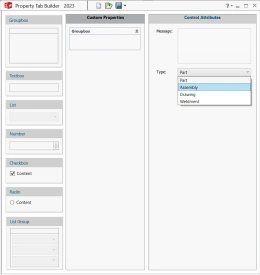
Image 3: Property Tab Builder
Select the file type as shown in Image 4.
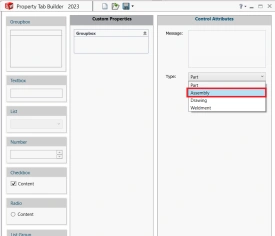
Image 4: Select File Type
1. The left column is a list of types of properties can be used.
2. The middle column is what will be shown in SOLIDWORKS when property tab is ready.
3. The right column is control attributes setting Custom Properties from Property Tab Builder: The Group Box of properties in the centre column can be expanded by double clicking on the group box and then dragging and dropping it onto the column.
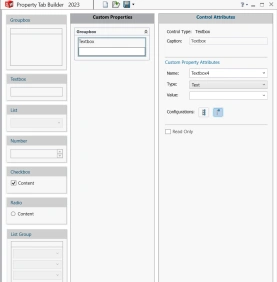
Image 5: Adding Group Box
Control Attributes:
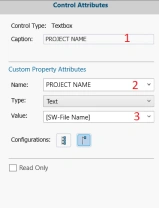
➢ Caption is name which appears above the text input field
➢This name stores the actual property in the model.
➢ Properties can be linked to the model by linking it to values.
Using the Property Tab Builder to Assign Properties:
1. Textbox
2. List
3. Number
4. Radio Button
Image 6: List
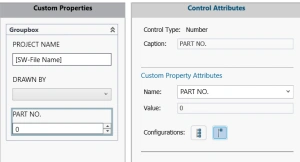
Image 7: Number
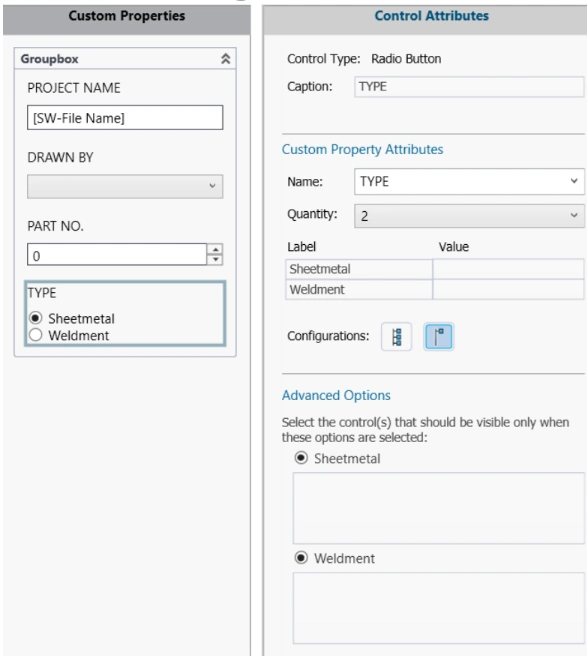
Image 8: Radio Button
Final Property Tab Builder:
By assigning attributes to the properties. You will get final Property Box.
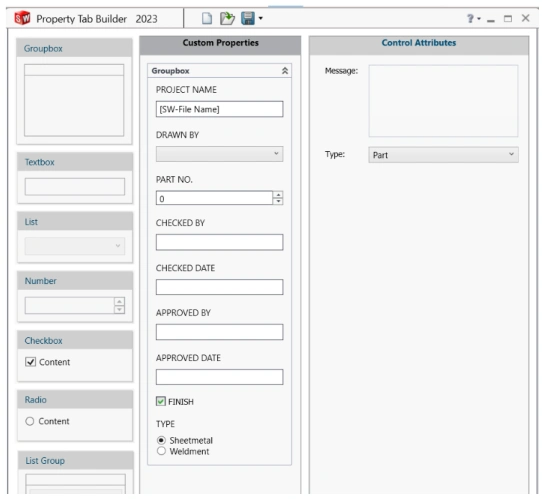
Image 9: Assembly Property Tab Builder
Save as to find the file location of your existing property file:
To use the customized version, Give the Location of custom file to the SOLIDWORKS file location as.
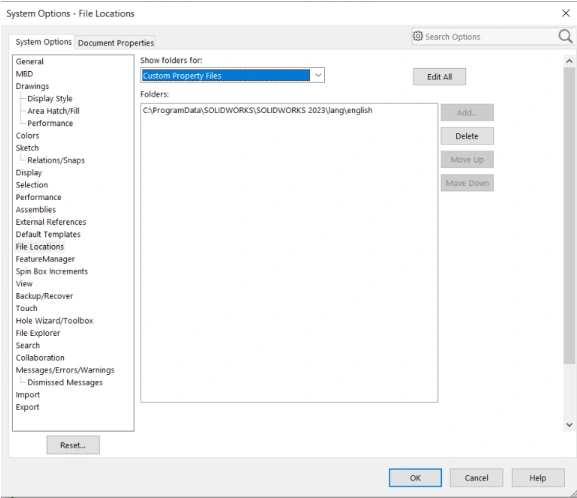
Image 10: File Location
Working in SOLIDWORKS with Property Tab Builder:
When you model a part and goes to the custom property from task pane, you can see the customized property builder you designed.

Image 11: Applied Properties to Assembly
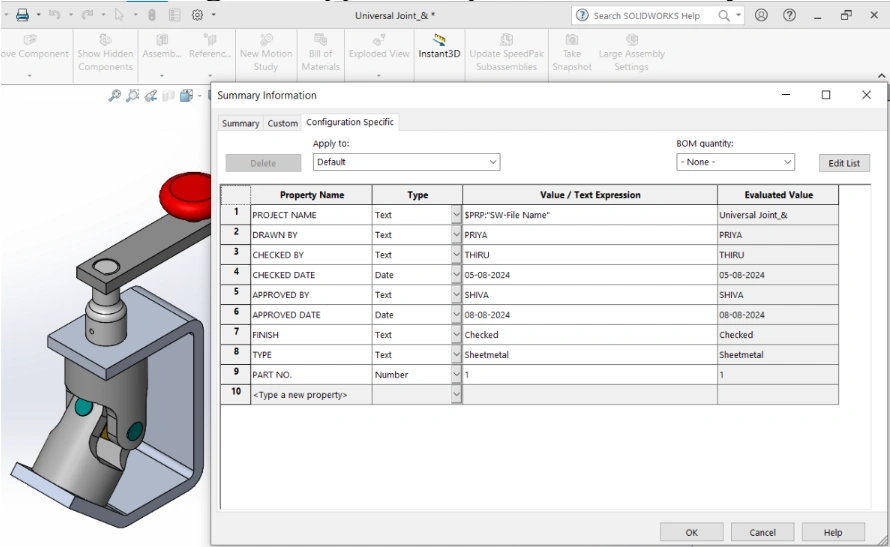
Image 12: Applied Properties in Custom Property Window
In the file property dialog, try activating the drop-down menu in the property name cell. Then you can create the custom properties.

The same method we can use to Part, Drawing and Weldment templates creation also.
Conclusion:
Property Tab Builder lets you create your specified properties in a single window and can be share it to all users so that properties can be applied by a single click, resulting in saving design time.
➡️Ready to take your workflow management to the next level? Enhance your skills with our comprehensive SOLIDWORKS Trainings. Whether you’re new to SOLIDWORKS or looking to refine your expertise, our tailored courses will empower you to make the most of 3DEXPERIENCE and SolidWorks tools. Learn how to efficiently manage tasks, streamline processes, and drive your projects to success.
➡️Don’t miss out on the latest breakthroughs in 3D technology and engineering solutions. Subscribe to our newsletter today and stay connected with industry trends, expert advice, and exclusive offers. Join our community of innovators and ensure you’re always a step ahead in your field. Sign up now!
➡️Elevate your design and production capabilities with state-of-the-art 3D scanners and printers. Unlock precision, speed, and creativity in every project. Discover the power of 3D technology and take your work to the next level—explore our range today!