

Creating an attribute in SOLIDWORKS ELECTRICAL and customizing the sheet according to our requirement.
Creation of attributes has few steps to follow
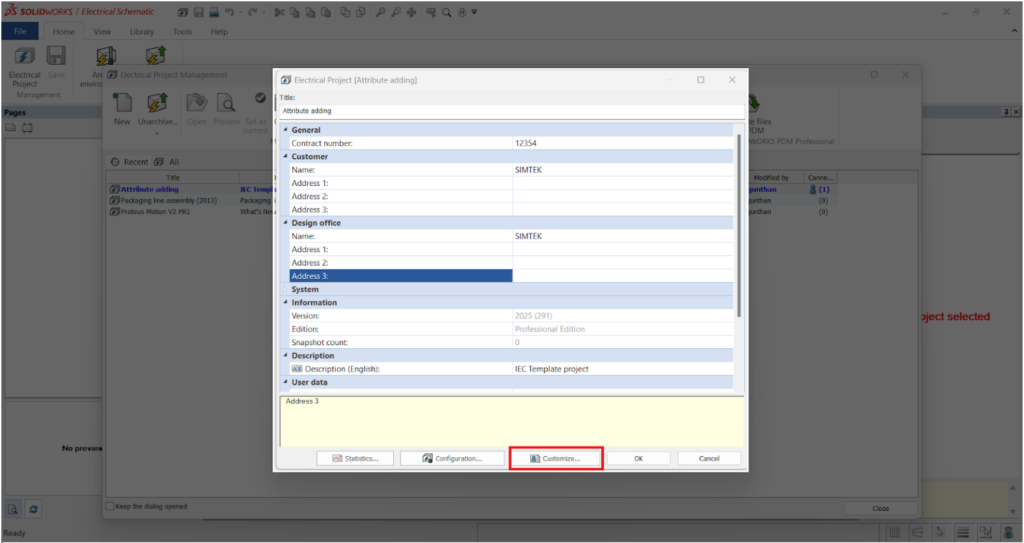
STEP 1
- To start a project, first aTo start a project, you must first fill in the project details.
- As shown in the below image
- Fill in the details of the whole project, such as customer, design office, designed by, and approved by, in the ELECTRICAL PROJECT MANAGEMENT TAB.
- The sheet will automatically update with these details.
- Using the highlighted “customize” option, you can input the new information needed to fit your specific requirements.
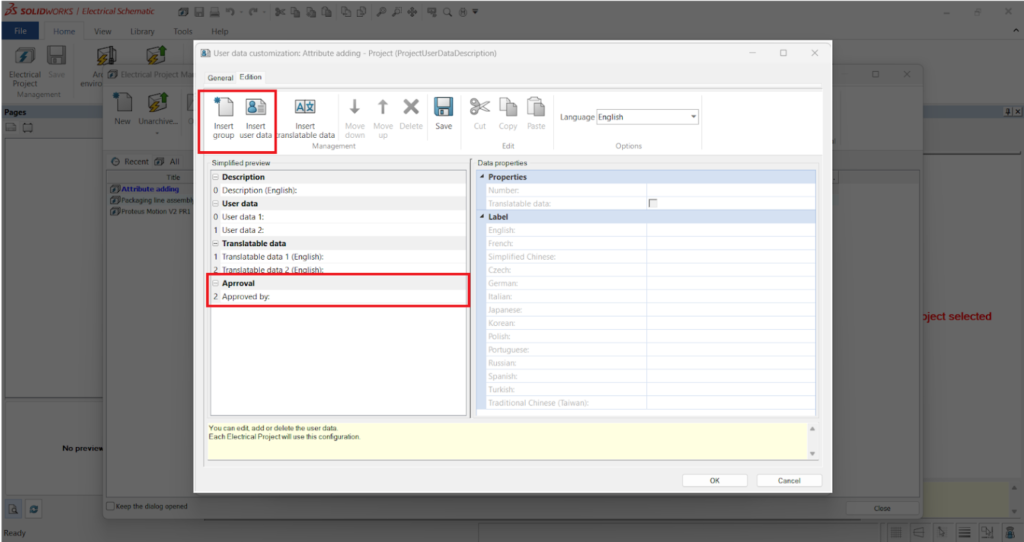
STEP 2
- Once you complete the above steps, the image below shows the result. As shown in the below image
- The system will open a USER DATA CUSTOMIZATION tab.
- With reference to the image below, you can add new information headings using the highlighted option.
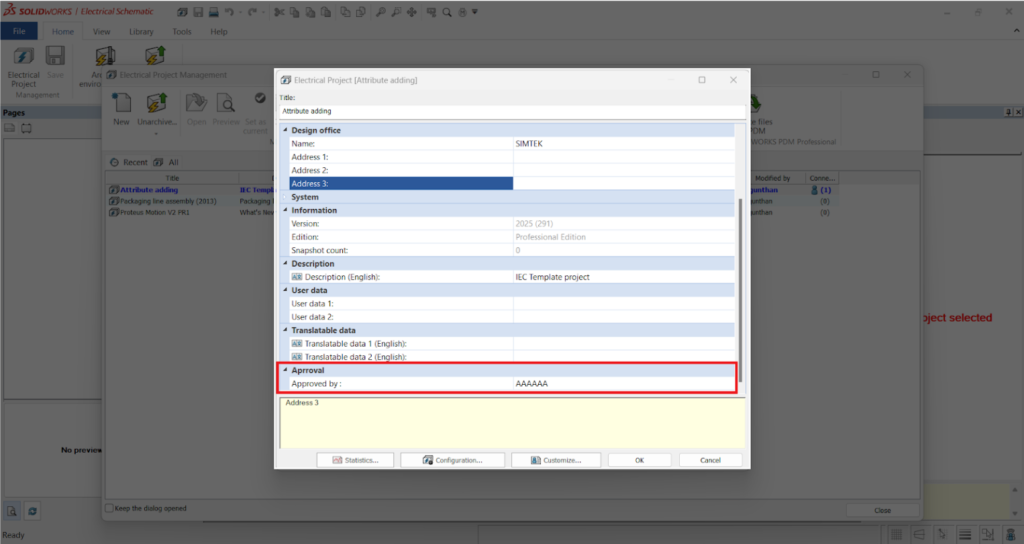
STEP 3
- After adding the information headings, you need to fill in the details in the ELECTRICAL PROJECT MANAGEMENT tab.
- After you fill in the information details, the system will update all sheets with the approved details.
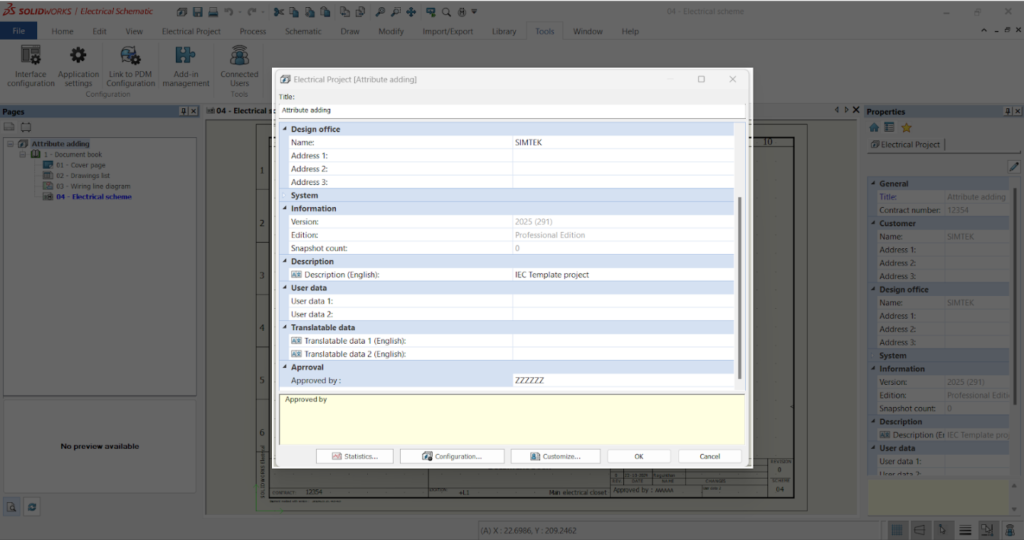
STEP 4
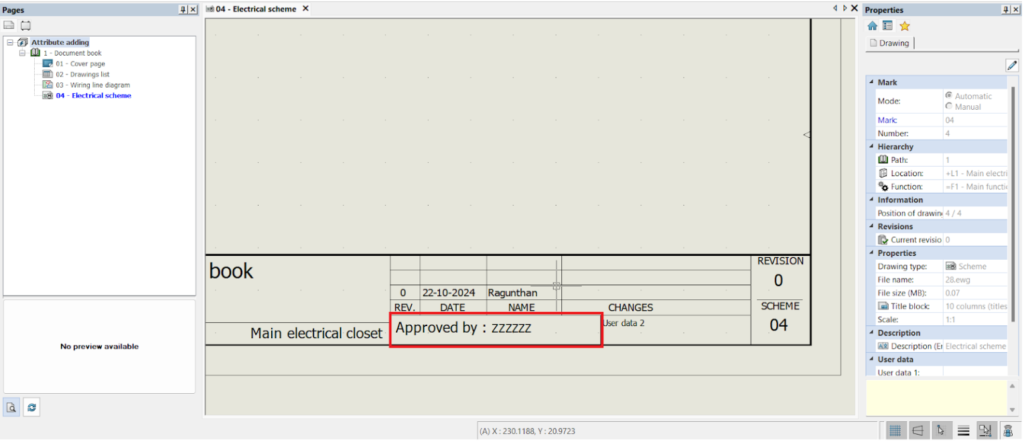
- The system updates the details filled in the ELECTRICAL PROJECT MANAGEMENT tab in the sheet, as shown in the image below.
- In the SOLIDWORKS Electrical interface, the system automatically updates using attributes.
- Placing an attribute has a few steps to follow will see those steps in an upcoming Blogs.

STEP 5
- The image below shows a small example of how changing the details updates the sheet.
Summary
- By following the above points, you can create a new heading with the customize option and fill in the new details.
- Once you complete these steps, SOLIDWORKS Electrical will automatically update the attributes on the pages.