Share and Mark-up
SOLIDWORKS Share and Markup simplifies design sharing with external stakeholders. They can view, annotate, and share comments on your designs. SOLIDWORKS Share and Markup streamlines collaboration. It allows external stakeholders to interact with your designs by viewing, annotating, and sharing comments. This functionality is available to anyone who has the 3DSwymer, Collaborative Designer for SOLIDWORKS or 3DEXPERIENCE SOLIDWORKS roles.
A key benefit of Share and Markup is that the recipient doesn’t need a 3DEXPERIENCE role or SOLIDWORKS license. This allows them to view the file, make notes, and share comments with you directly. All they require, is a 3DEXPERIENCE account, which can be created for no cost. This way, you can avoid the hassle of alternative file sharing tools that can add unnecessary overhead to your design collaboration process.
1. How to enable Share and Markup capabilities
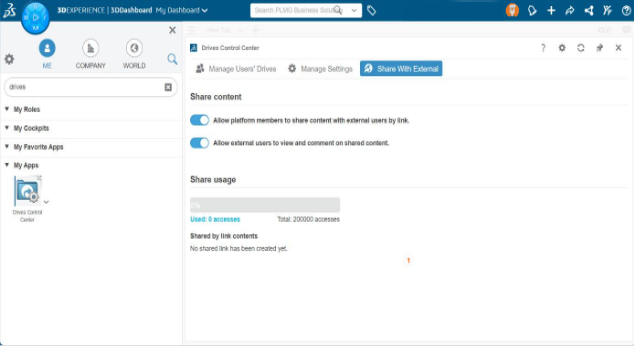
To share files with external recipient some initial setup is required using the Drives Control Center app. The platform Administrator must turn on:
- Allow platform members to share content with external users by link.
- Allow external users to view and comment on shared content.
These settings are located on “Share with External” tab.
2. Sharing a file from SOLIDWORKS
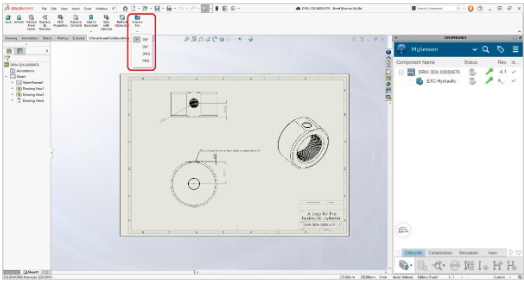
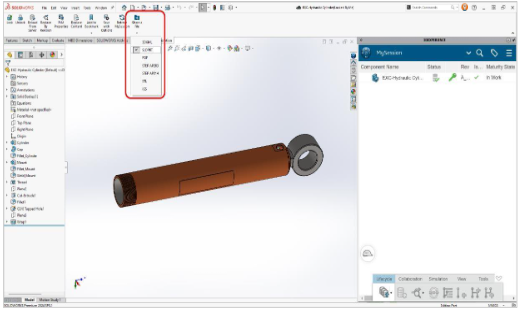
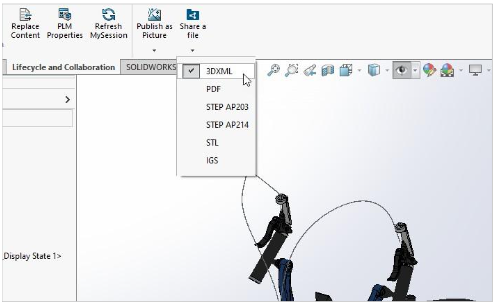
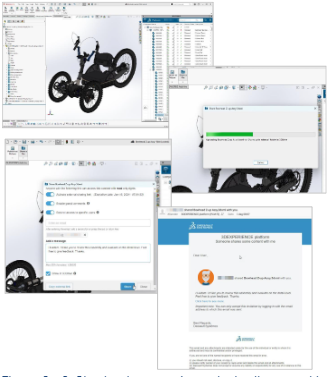
In SOLIDWORKS you chose the file format to share. From the “Lifecycle and Collaboration” tab you can select the ‘arrow down’ on the “Share a file” button and then select the desired file format.

In this example 3DXML is chosen, this is the recommended format for sharing an assembly. The 3DXML file will contain all of child components and sub-assemblies.
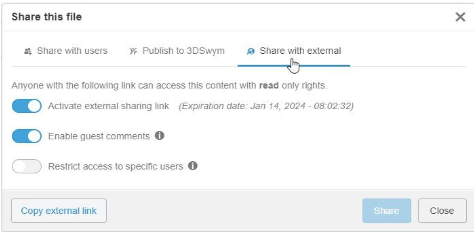
After choosing the file format, you can create the sharable link. Click the “Share a file” command again and a formatted file is created and placed in your 3DDrive application, in the folder named “Shared with external”.
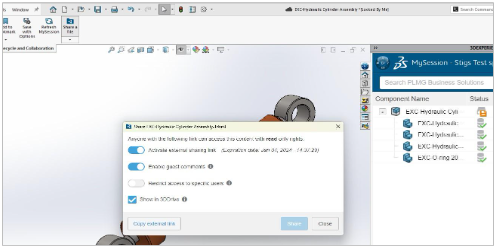
plus, a dialog box will appear with an option to enable guests to comment on the file, plus an option to restrict access to specific users. If you do NOT enable “restrict access to specific users” anyone with the shared link can access the file.
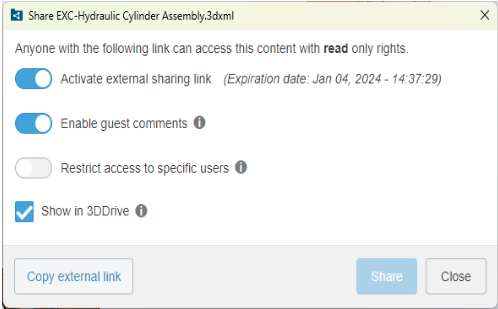
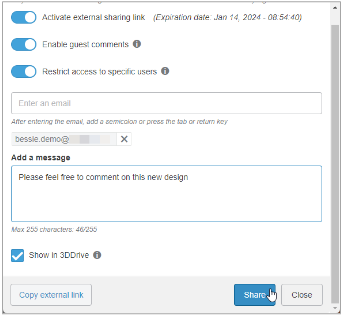
However, if you activate “Restrict access to specific users” you will have the option to type in the email address of the person you wish to share your file with or multiple email addresses if several persons are to be involved and finally, you can add a message in the dialog box.
However, if you activate “Restrict access to specific users” you will have the option to type in the email address of the person you wish to share your file with or multiple email addresses if several persons are to be involved and finally, you can add a message in the dialog box.
The recipient will receive an email with a subject line stating the name of the sender, the name of the file, and a link to access the shared file.

A free 3DEXPERIENCE ID account will be prompted to be set up by recipients when they click on the link, if they don’t have one already. If they do have an account, they can just select the link and access the model by signing in to the 3DEXPERIENCE platform. Note: They must use the same email address entered when creating the shared link.
3. Adding annotations and comments to the shared file
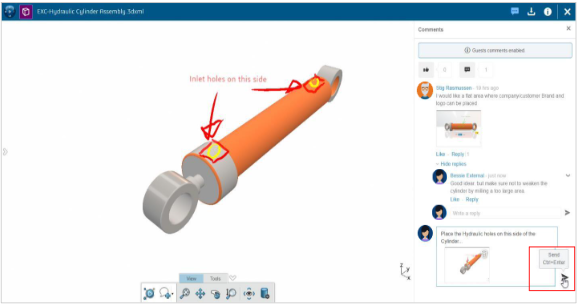
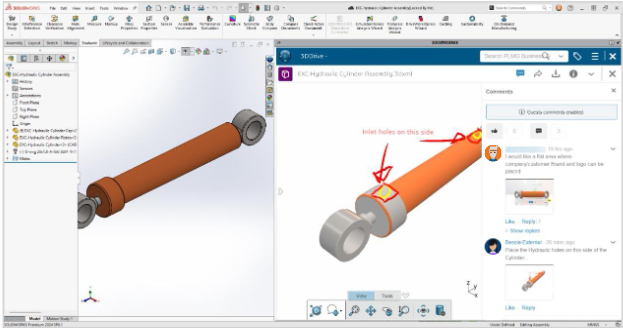
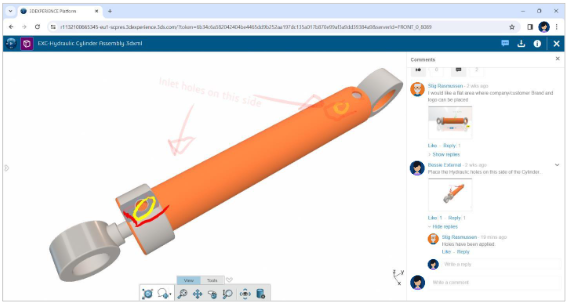
Once the recipient has logged in, they can access the model from their browser, which will take them to the shared model in the 3DPlay viewer application, where they can rotate, view, mark up, and comment on it using the intuitive tools in 3DPlay.
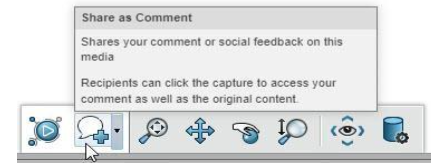
All the recipient needs to do is hover over the icons to get a description of the various tools to begin a “mark-up” procedure.
As an example, they can click on the Edit Clipping tool, which cuts through objects using a section plane to view and to access details inside an object, and also to measure hidden items.

4. Sharing annotations and comments with the original sender
A snapshot of the markups/comments can be saved by the recipients upon completion of commenting, by hitting the “Share as Comment” command. This snapshot will then be shown in the Comments window to the right of their screen.
When the feedback has been applied and sent, the original sender will receive a notification from the 3DEXPERIENCE platform.
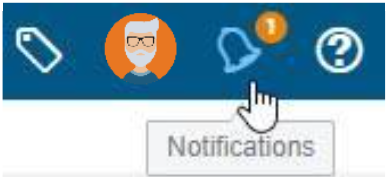
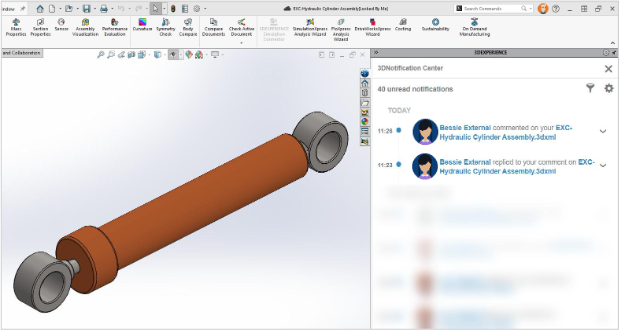
Clicking on the notification displays the 3DPlay app in the SOLIDWORKS task pane, where of the annotations and comments made by the recipient of the file can be viewed.
5. Understanding where shared files are stored in 3DDrive
The process which has just been described, seems very automatic and simple, and so it is. However, it’s always important to be aware of where the shared files are located, if you, at some point, wish to search for a specific file and other files that might have been shared.
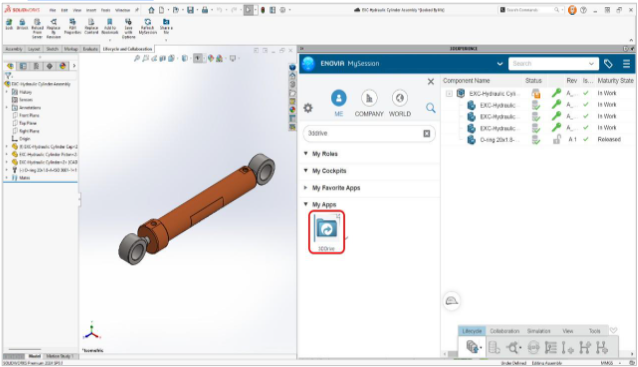
SolidWorks lets you search directly within 3DDrive by opening the application through the Compass.
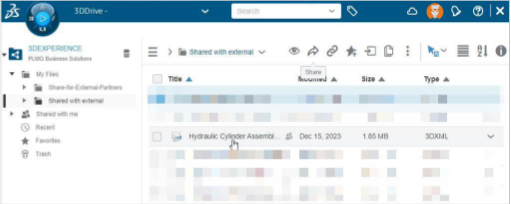
The 3DDrive application appears and shows all the 3DDrive folders you have access to. Sharing a file like shown in the previous steps automatically creates a folder named “Shared with external” within your “My Files” folder.
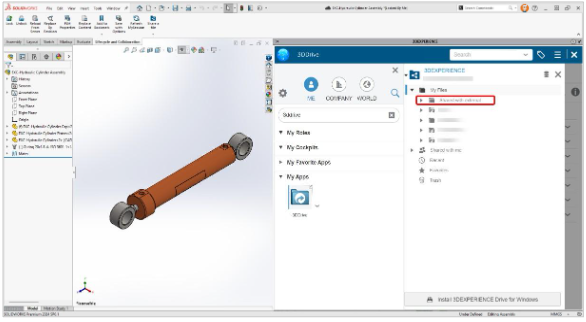
This is where all the files you have shared using the “Share a file” feature in SOLIDWORKS are be located.
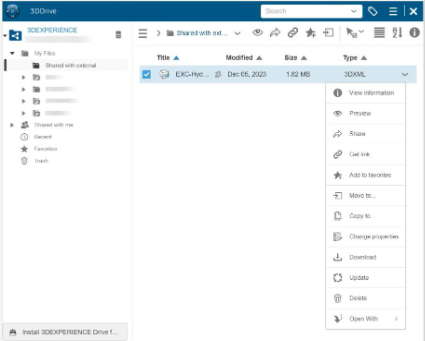
All the files you have shared from SOLIDWORKS are accessible from this folder. From here you have several options, for example viewing the information of the files you have shared and previewing it so you are able to see exactly what the external recipient is seeing when they open the file in the browser. Deleting the file removes all comments and markups because 3DDrive, not 3DSpace, stores this information.
6. Adding new users to existing shared files
If you want to add more external recipients to collaborate with, you can do it from the folder as well. Just select the desired file, select the share button and then the “Share with external” tab and you get the same window as described previously.

Note: Although there is an expiration date “30 days from link creation” it is only the link to the file that expires, not the file itself. 3DDrive will continue to store the shared file until you remove it.
7. Revoking access to shared files
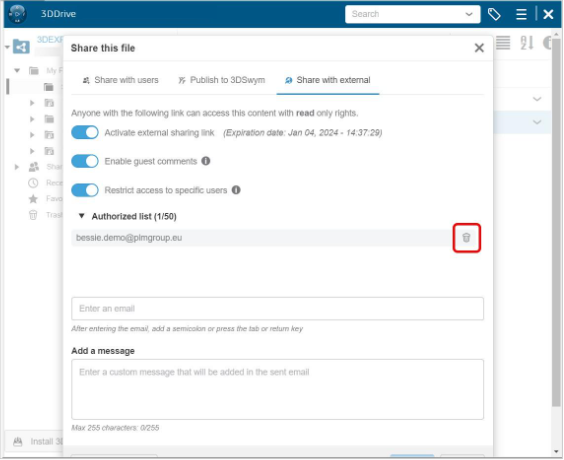
You have the option to revoke the shared access. When you have located the file you wish to revoke access from in the 3DDrive “Share with external” folder, open the “Share with external” tab in the “Share this file” menu.
Select the “Authorized list”
This feature will display a list of authorized users for the file. You can then select the recycle bin icon next to a user’s name to revoke their access.
Share and Markup – use case examples
In this chapter you will find 3 use cases for sharing documents. Consultant designers, suppliers, and manufacturers commonly use these examples in their daily exchange of information.
1. Sharing a SOLIDWORKS drawing
Let’s say you need to share 2D drawing with a supplier. In this case you have made some changes to an original part and would like to get feedback from the supplier.
From the drawing in SOLIDWORKS, you can share the file as PDF, DXF, DWG and PNG.
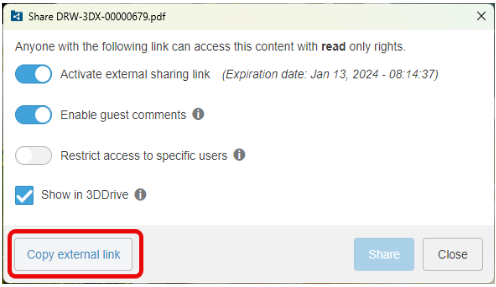
Having chosen PDF as file format – select “Share a file” again. In this example we will not restrict the access to the file, so we will just make sure that the “Enable guest comments” is active and then click the “Copy external link” followed by “Close”.
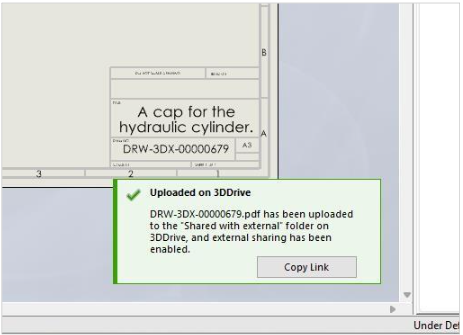
The dialogue informs you that the file has been uploaded to 3DDrive upon closing. And if you forget to copy the link before closing the “Share a file” window, there is a Copy Link button in the info pop-up. This pop-up will disappear after a while. Hovering over it, will keep it visible.
You can actively rephrase the sentence as: “We can send the copied link to an external supplier by email.”

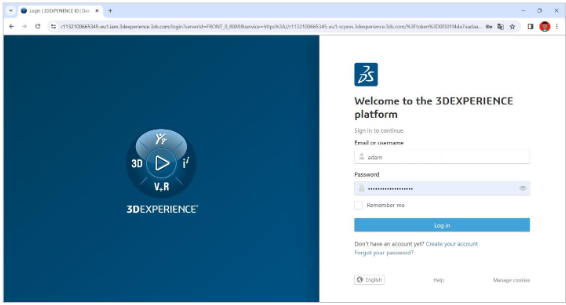
The external recipient pastes the link into a browser. They can then log in to the 3DEXPERIENCE platform using their account credentials to view the file.
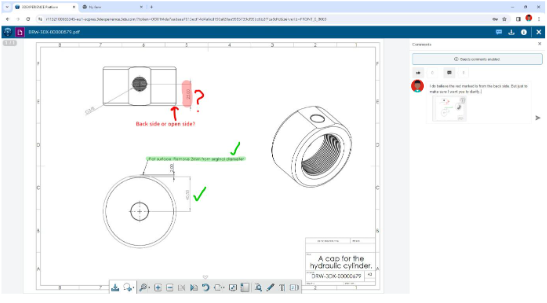
The recipient can now access the drawing and start giving feedback. They can also share comments as described previously.
2. Sharing a design for manufacture
We have approved your design and it is ready for manufacturing. Now you need to send the 3D file. You could send it as a STEP file or as a native SLDPRT file. This can in some cases make it much easier to start producing data for CNC machining or 3D Printing.
Sharing a modified file is easy. Simply select ‘Share a file,’ and a dialog box will appear allowing you to update the existing file.
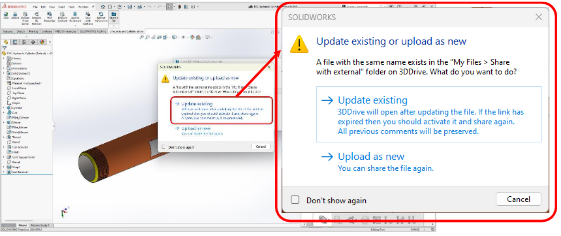
Updating the file retains all previous annotations and comments, allowing the communication thread to continue seamlessly.
3. Sharing a large assembly design for review
When dealing with large assemblies, sharing a design efficiently can pose a real challenge as file sizes can get large. In the past, opening a large assembly, even in lightweight mode, often required the recipient to have a workstation running the native CAD application.
This task is now much easier in SOLIDWORKS by utilizing a combination of the 3DXML file format and the Share a File feature.
The 3DEXPERIENCE platform allows you to view 3DXN{L files on both workstations and mobile devices. As long as you access the received link for the shared file — you will be able to open> view> zoom and rotate> explode even complicated assemblies.
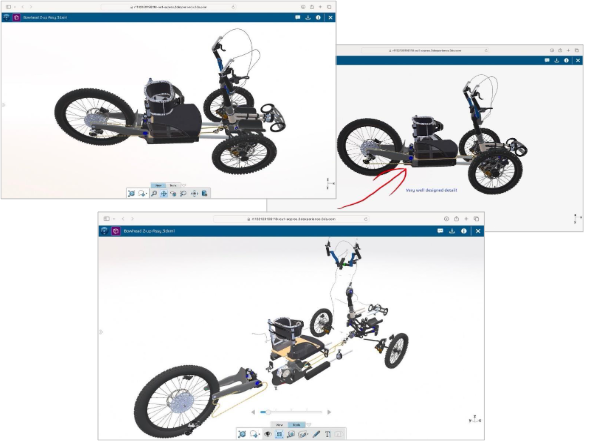
Let’s have a look at an example using an all-terrain adventure bike designed by Bowhead Corp.
You have opened the assembly in SOLIDWORKS and prepared it for sharing by selecting 3DXML as the file format.
The sender selects the “Share a file” command and then proceeds to step through the sharing procedure described earlier.
he recipient clicks the link and logs in to 3DEXPERIENCE. They can then easily view the assembly and add comments. This device running a non-Windows operating system took these screenshots.
Share and Markup compared with traditional methods of file sharing.
Using the Share and Markup workflow can remove the need to use traditional methods of file sharing. Traditional methods of file sharing include PDFs, screenshots of models in documents, and even SolidWorks Pack and Go. These methods often require multiple applications and can cause compatibility issues. Share and markup takes away previously used unstructured workflows and eliminates the typical obstacles in historical file sharing which include:
- The need for various applications for saving and viewing files.
- File sizes exceeding mailbox capacity.
- File formats not compatible with recipient operating system or applications for viewing.
Share and Markup summary
SOLIDWORKS Share and Markup offers a powerful solution for sharing designs with external stakeholders. This functionality leverages the Share a File command and the 3DEXPERIENCE platform. It eliminates the need for less efficient file sharing methods. With SOLIDWORKS Share and Markup, you eliminate the hassle of manual file zipping, email limitations, and recipient software downloads. Now, anyone can view and comment on your designs using a simple web link. The 3DEXPERIENCE platform lets you work through your browser. This allows recipients to view and add comments to shared files on a mobile device.
SOLIDWORKS Share and Markup streamlines design collaboration. Designers and stakeholders can work together efficiently, getting products to market faster.