How to create a drawing template in xDesign
Set up a title block once, save it as a sheet template, and every new drawing you start will carry the same layout, company details, and linked attributes.
Create the isometric view
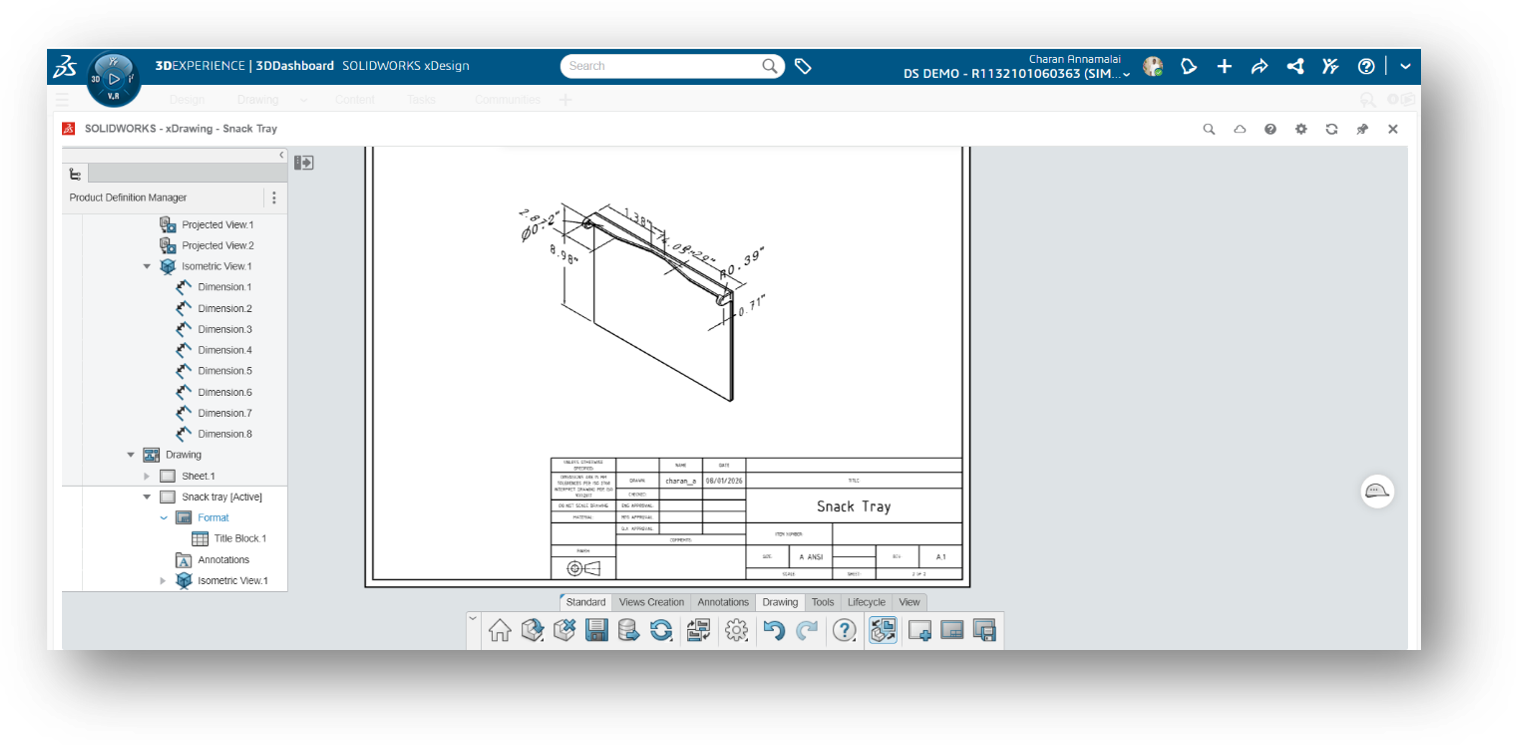
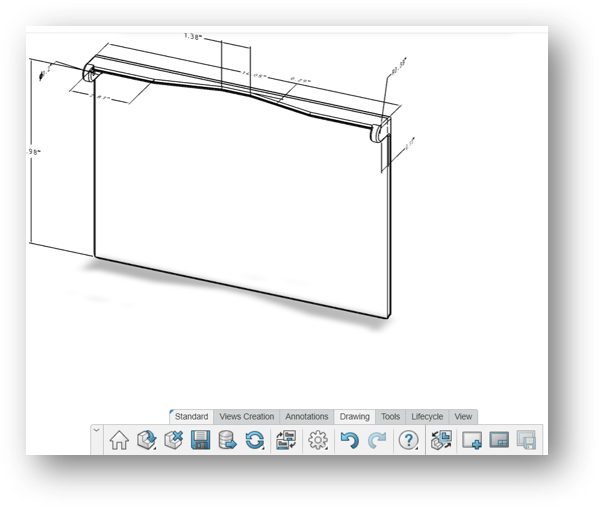
To create a template in xDrawing, we will start by creating a simple isometric view of the model. An isometric view shows the 3D shape of the part in a clear and easy-to-understand way. After creating the view, we will add all the required dimensions so that the drawing is complete and ready to be used as a template.
Activate the sheet background
Next, click the Activate Sheet Background icon. The sheet background will turn grey, indicating that you are now in Sheet Background mode. In this mode, you can edit the drawing sheet, such as modifying the title block, adding company information, or customizing the template layout.
Open the table editing tools
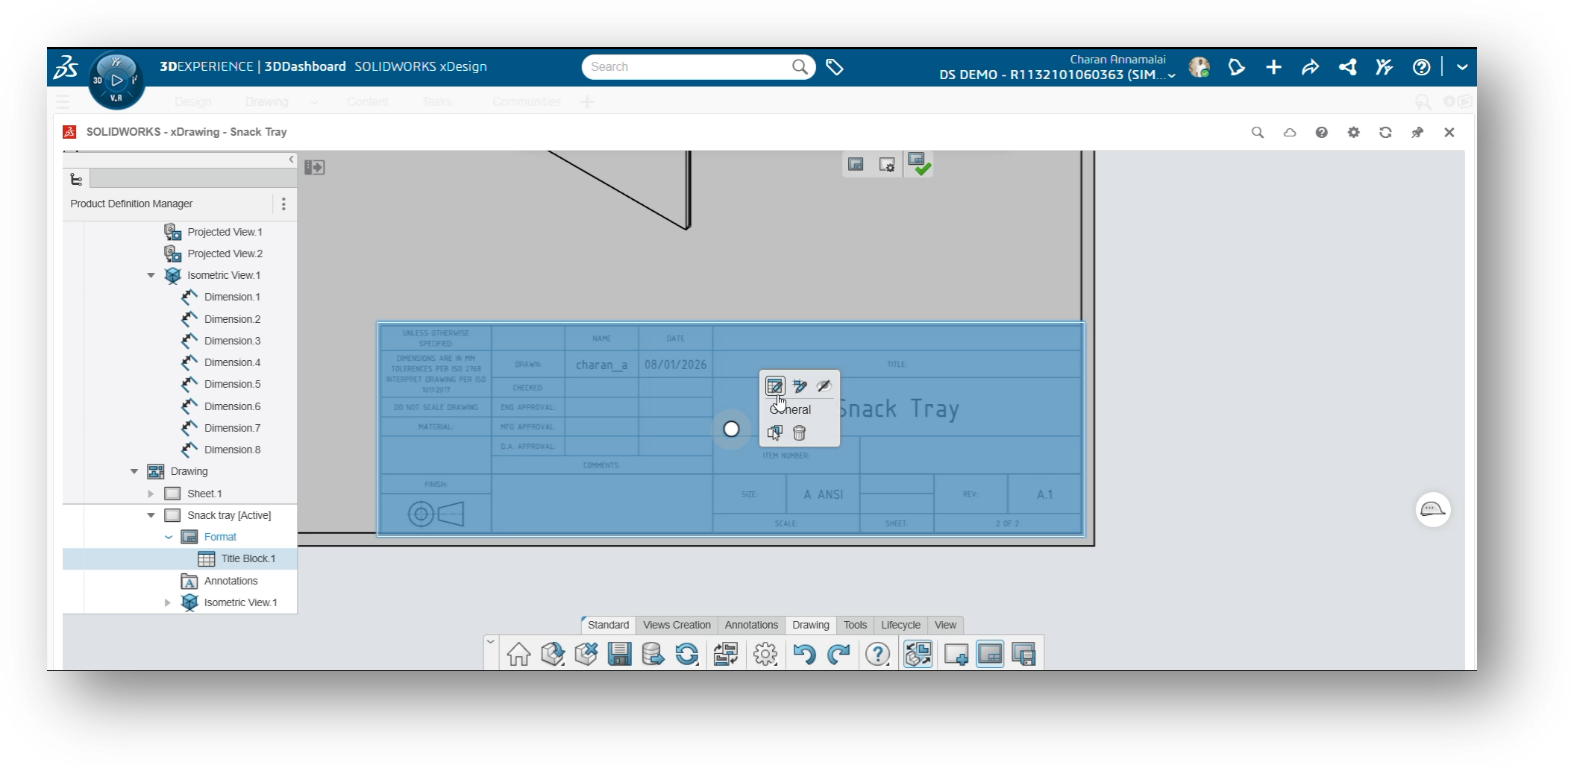
When you click on the table, different editing icons will appear. These icons allow you to edit the table or modify individual cells. Simply choose the appropriate icon based on the task you want to perform and make the required changes.
Resize the sheet title
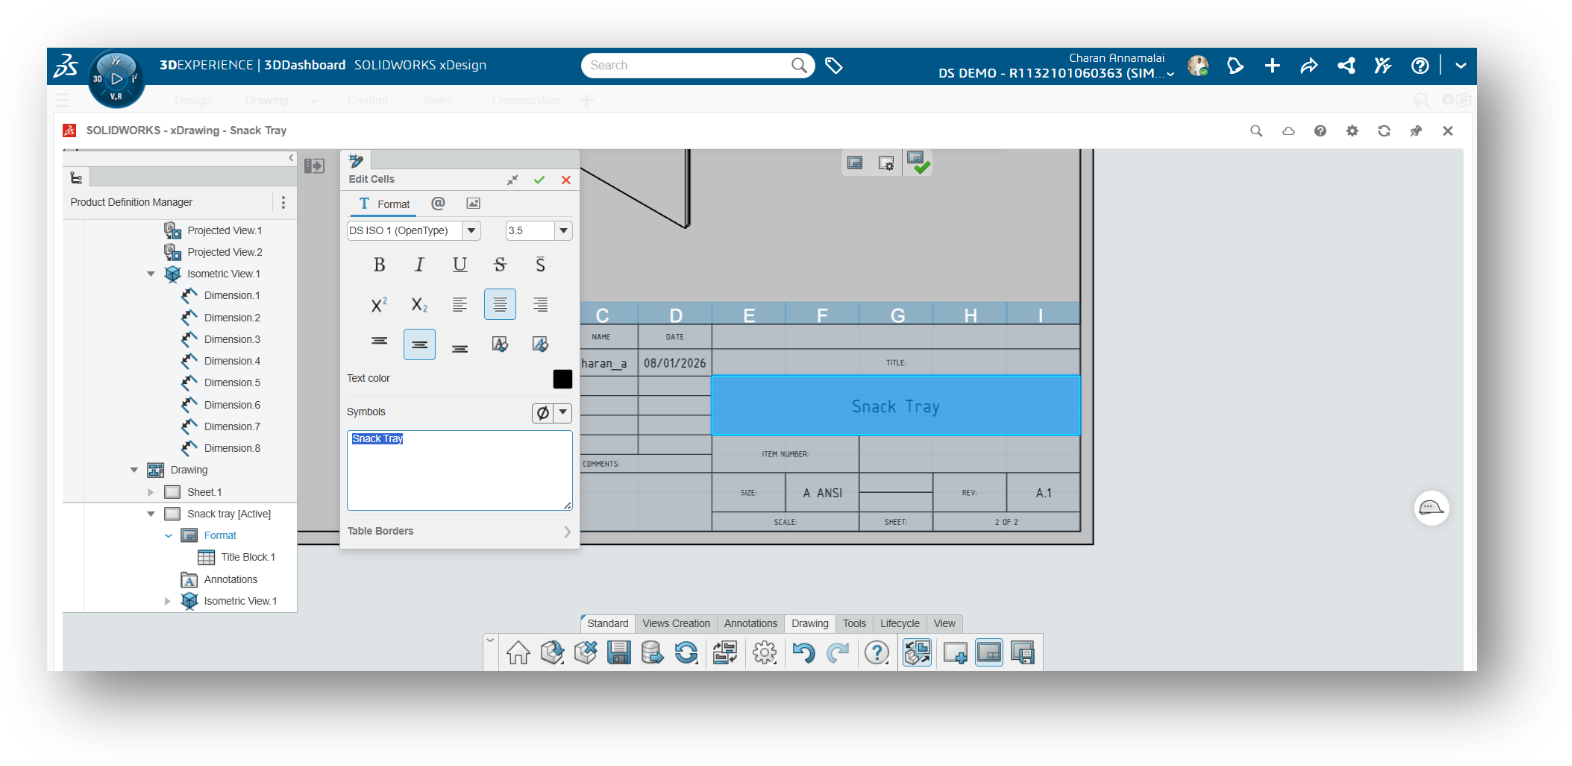
Next, we will edit the table cells. In this step, we will change the size of the sheet title so that it is clear, properly aligned, and fits the template layout.
Add your company name
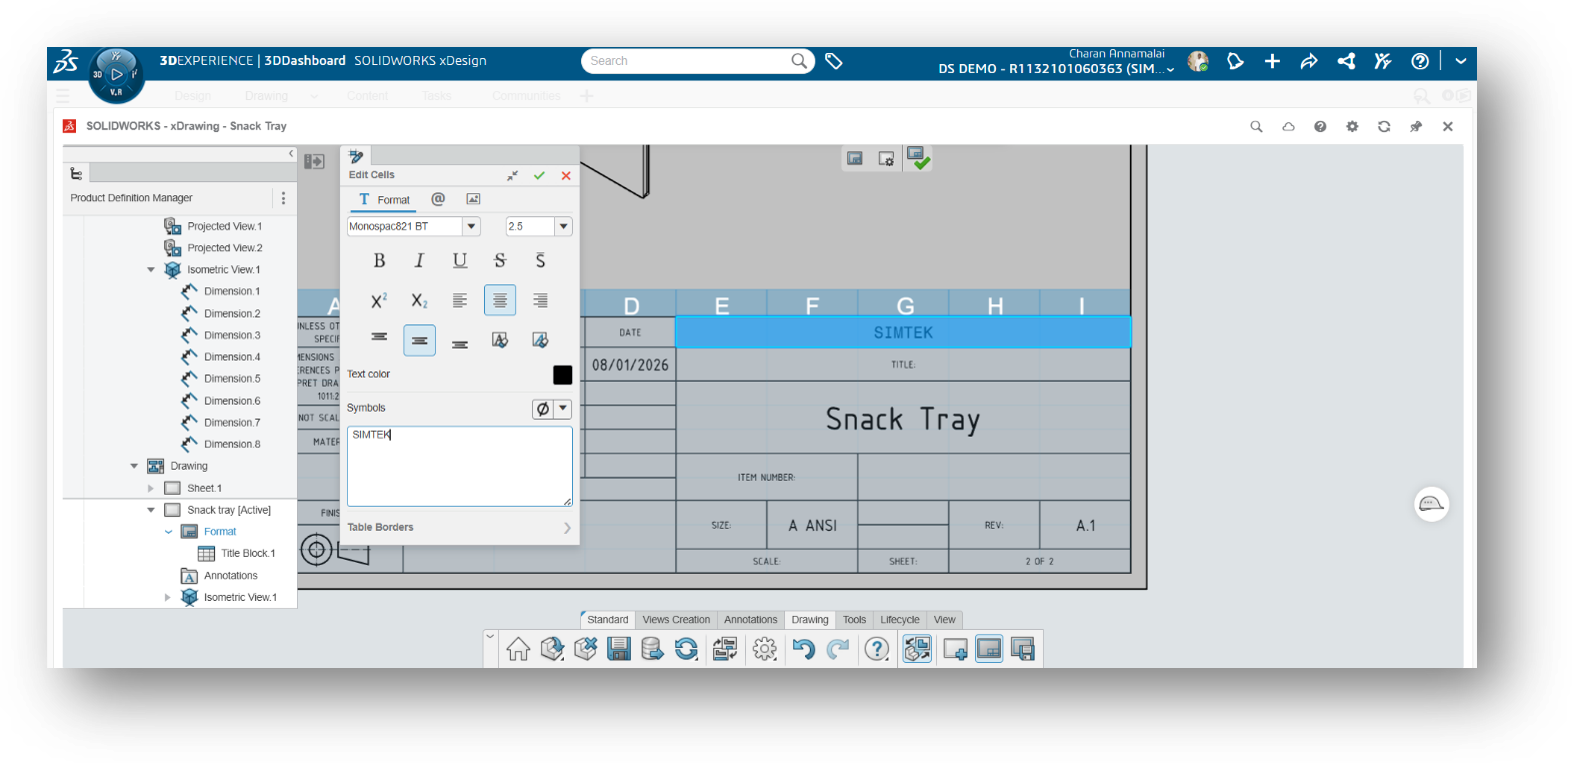
Next, select the appropriate cell in the title block and enter your company name. This allows the company information to appear automatically whenever you use this drawing template.
Link attributes to cells
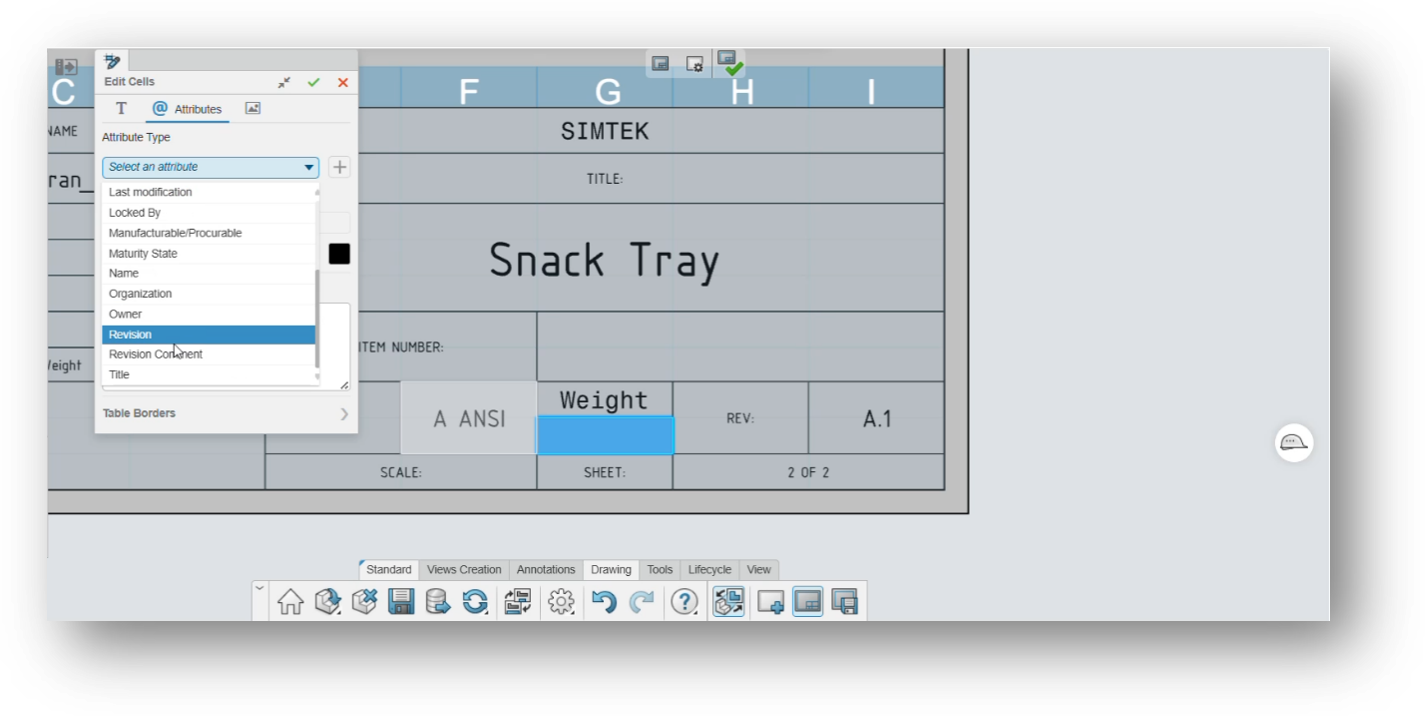
Next, select the cell where you want to display the Weight value. From the Attributes list, choose the Weight attribute and assign it to the selected cell. In the same way, you can insert any other available attribute, such as Material, Part Number, Revision, or Description, depending on the information you want to display in the drawing template.
Save as a sheet template
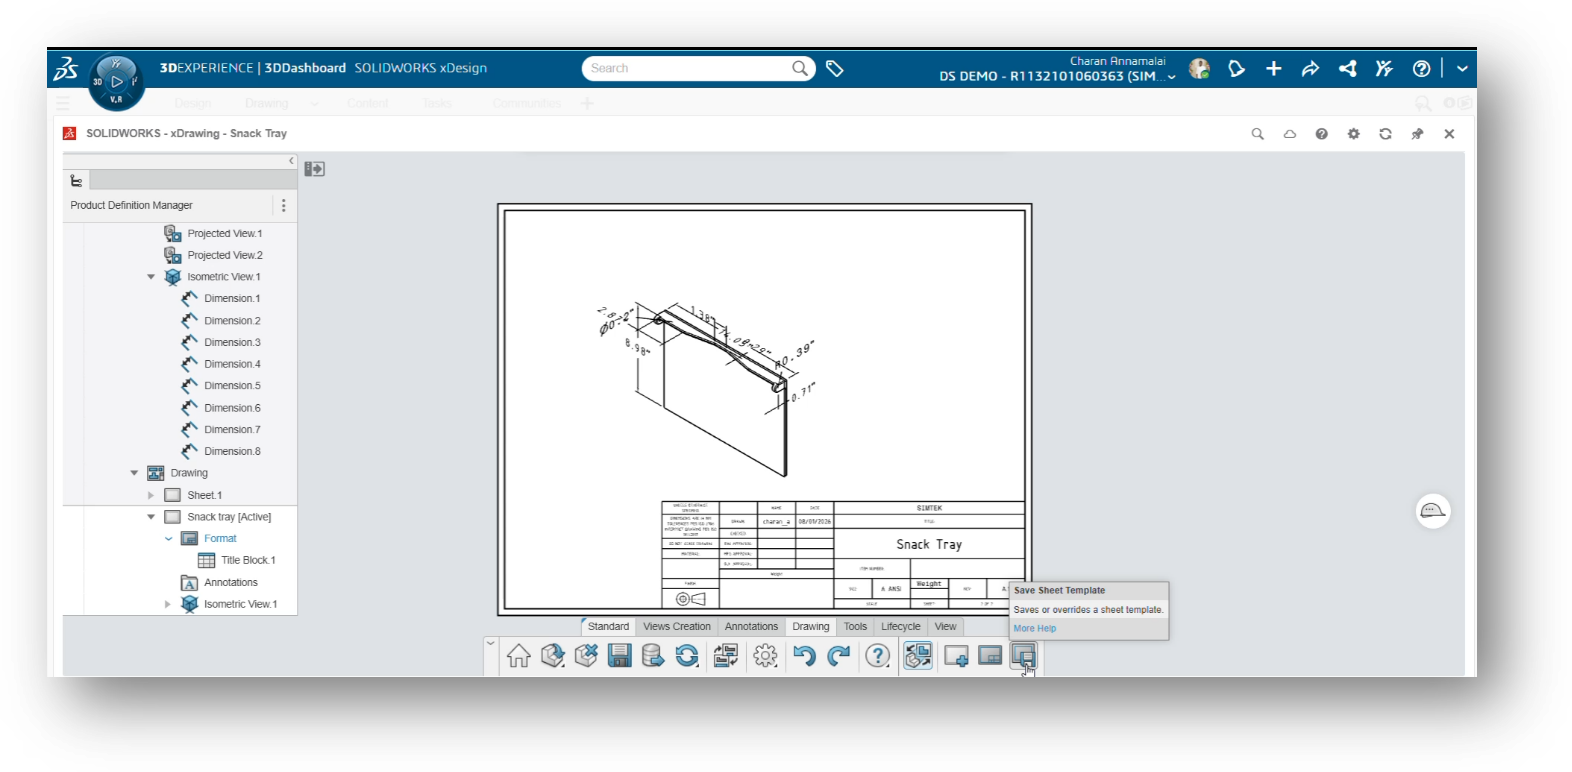
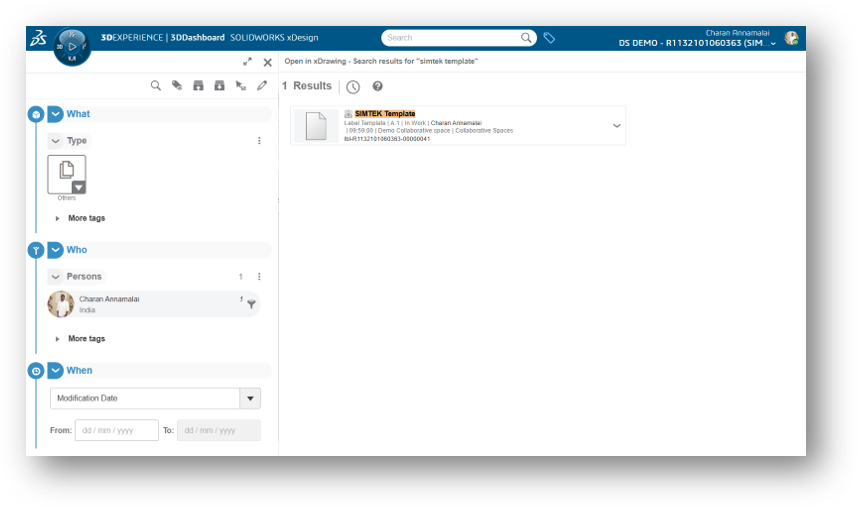
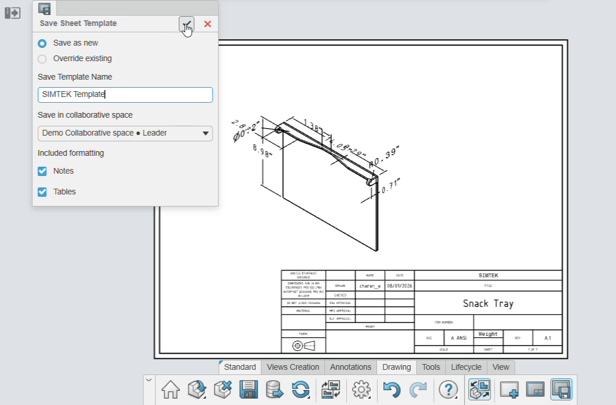
Once all the required changes have been made, click the Save as Sheet Template icon. Enter SIMTEK Template as the template name, and then save it. This template can now be reused whenever you create a new drawing, helping you maintain a consistent drawing format.
Reuse the template on a new sheet
You can now reuse the saved sheet template by adding a new sheet to the drawing. While creating the new sheet, simply select the Simtek Template. The new sheet will automatically use the same title block, layout, and attributes, saving time and ensuring consistency across all your drawings.