
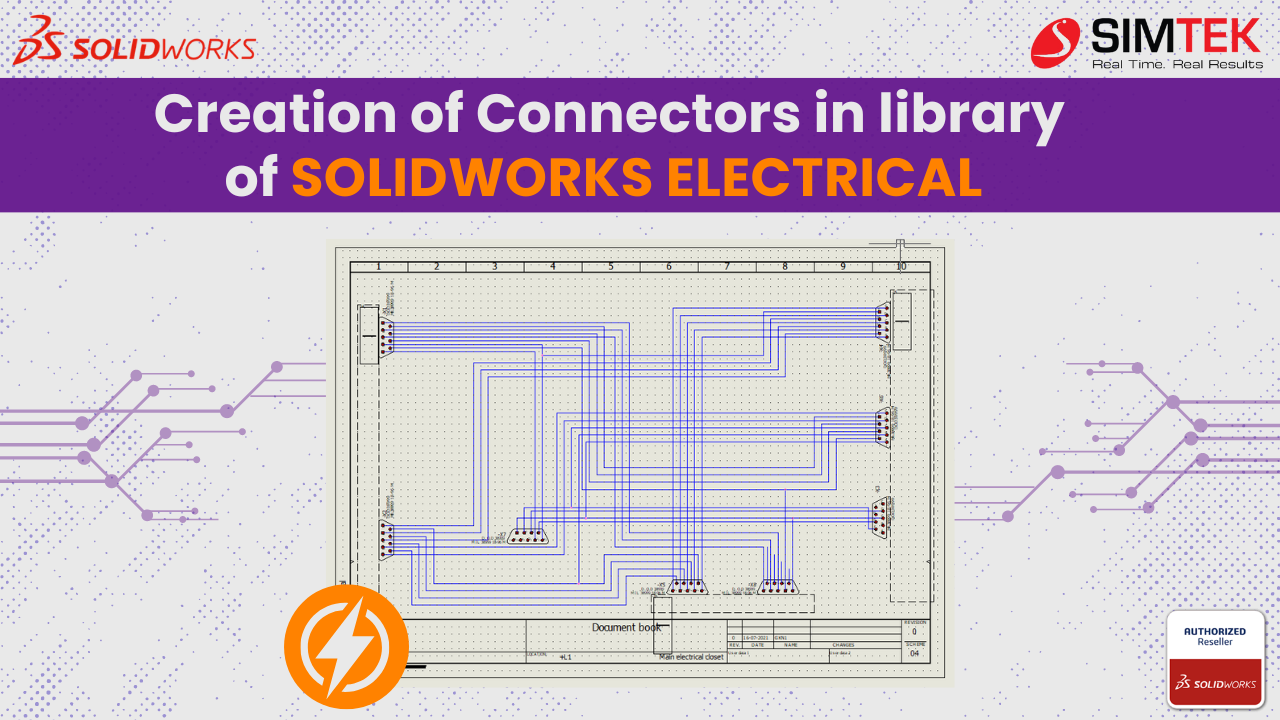
This blog will guide you through creating custom connectors in SOLIDWORKS Electrical Schematics libraries and using them in your schematics.
Storing Connectors in the Library
Storing connectors in the library allows for easy access and reuse. Once created, they’ll remain in the library until you manually delete them.
Step 1: Accessing the Library
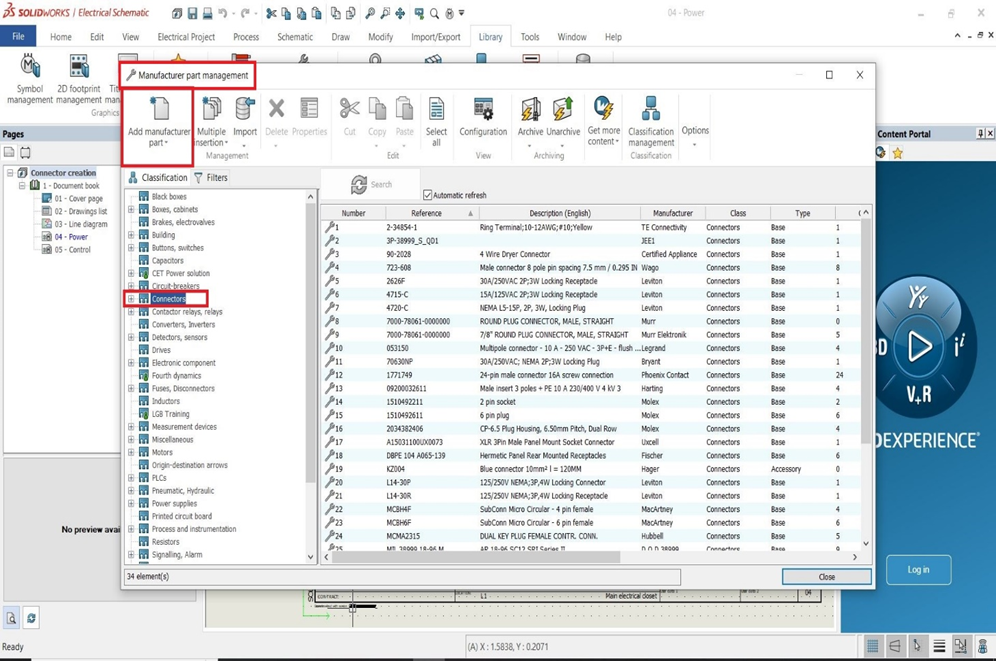
Go to Library > Manufacturer Part Management.

Step 2: Selecting the Connector Folder
The Manufacturer Part Management window displays various component categories. Select the Connector folder.
This will show connector-related manufacturers on the right side.
Step 3: Adding a New Connector
Click the Add Manufacturer Part button to create a new connector. You’ll then be able to fill in details about the connector in a separate tab
Step 4: Defining Connector Properties
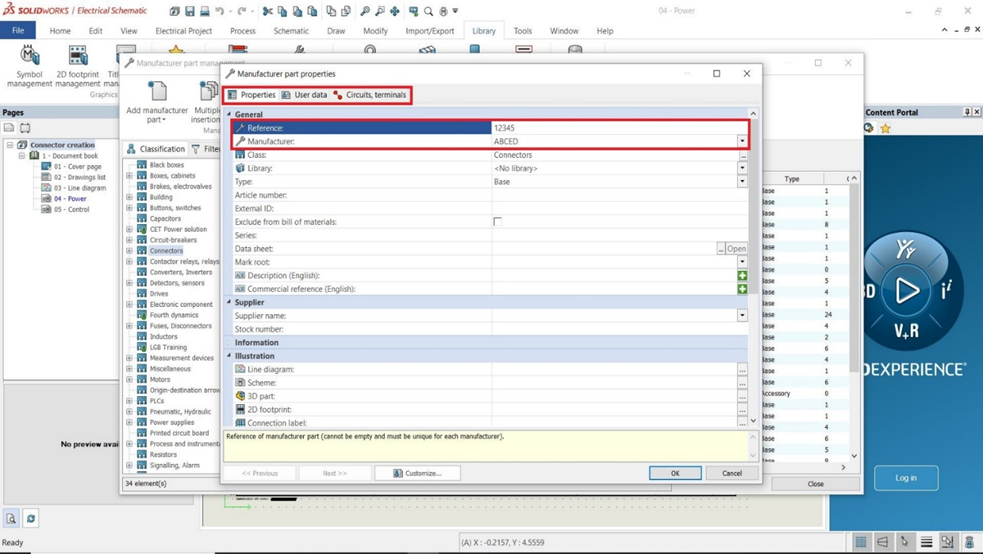
The Manufacturer Part Properties tab opens with three sections: Properties, User Data, and Circuit Terminals.
In the Properties section, fill in mandatory details like reference and manufacturer. Fill in optional details like height, weight, and supplier name in the scrolling section below
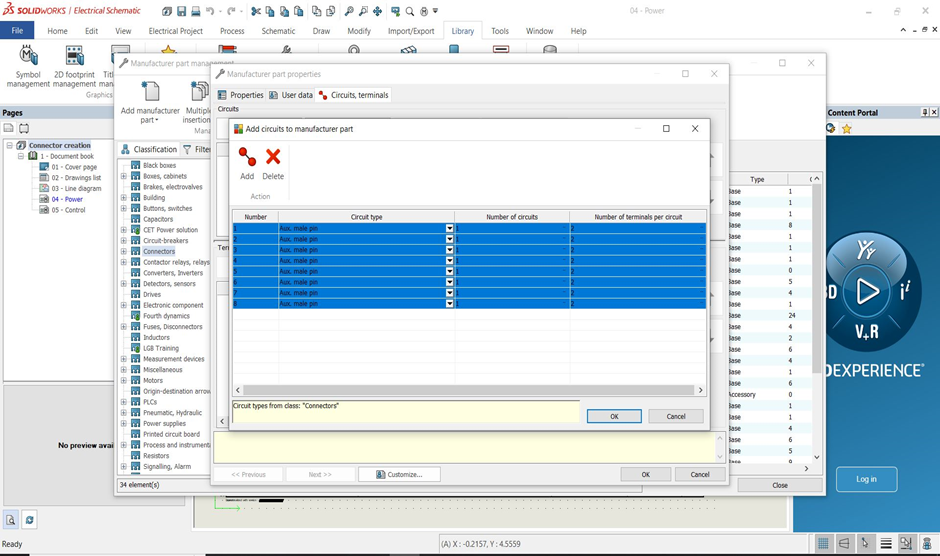
Step 5: Specifying Circuits and Terminals
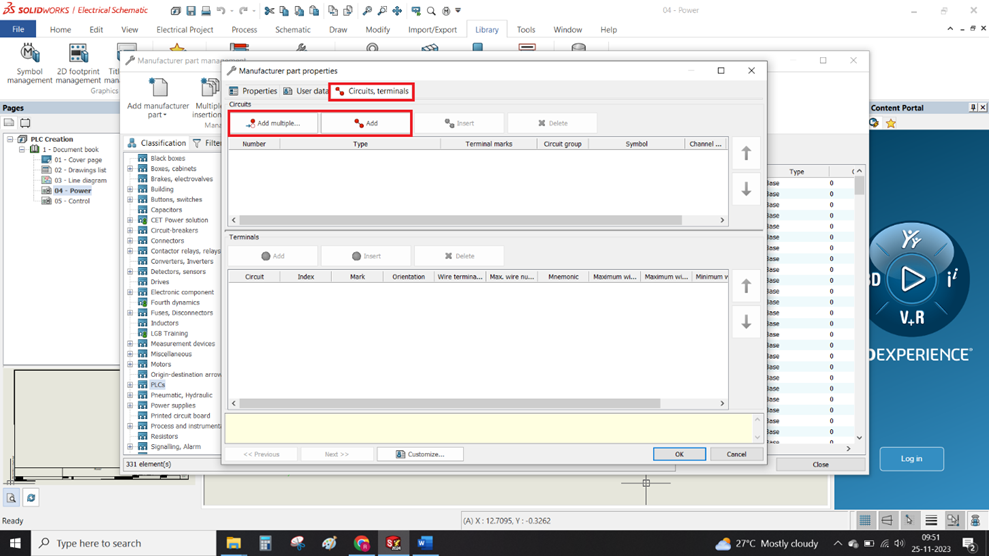
Define the circuit types the connector can be used with by using the Circuit Terminals option.
Click the Add button to add a single circuit or the Add Multiple button to add multiple circuits simultaneously.
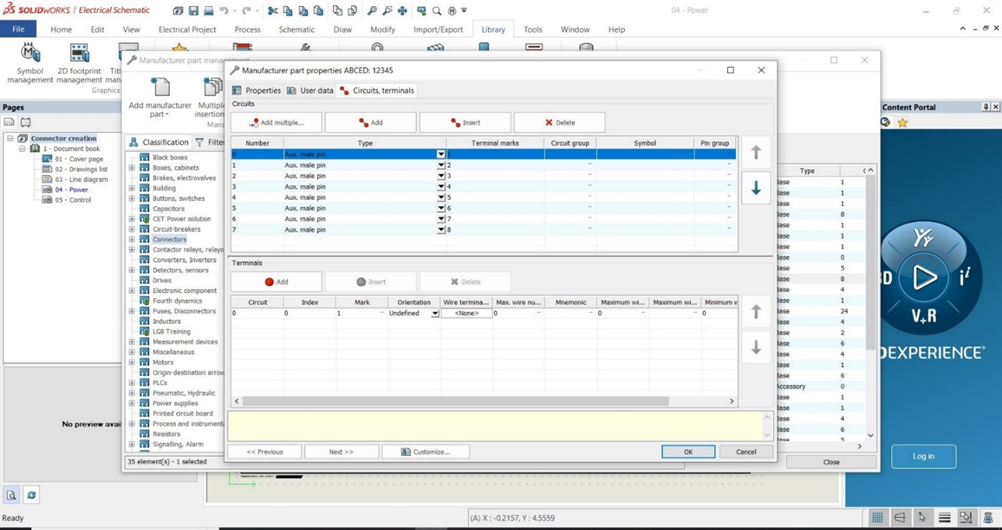
Step 6: Adding Connector Pins
Use the Add Multiple option to quickly add multiple pins to the connector. After adding the pins, manually assign terminal marks to each pin.

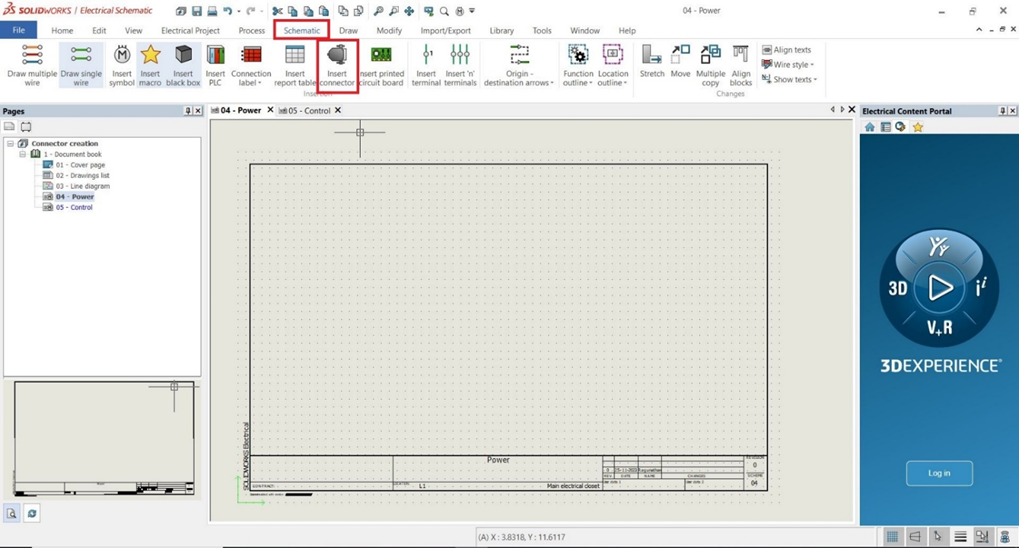
Step 7: Inserting the Connector in Schematics
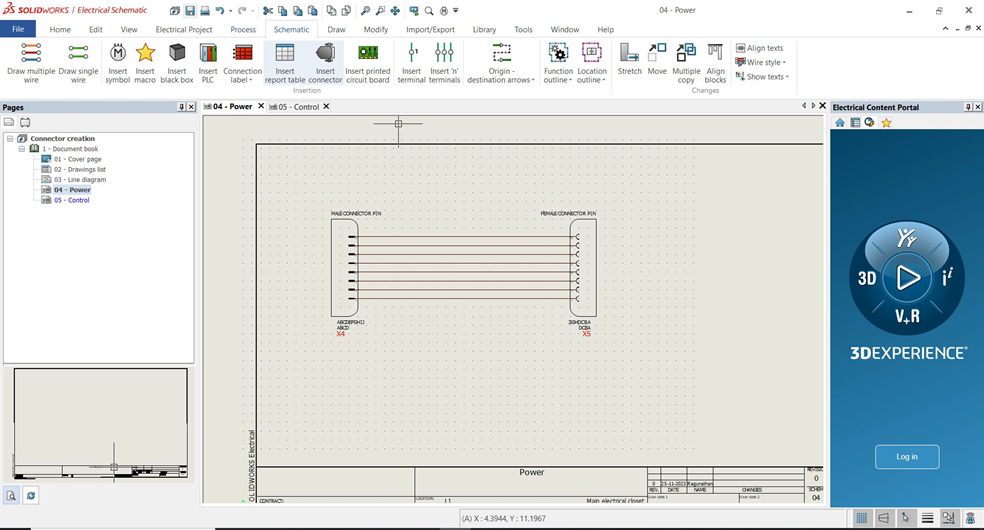
Once you’ve created the connector for both male and female pins, you can insert them into your schematic page.
Go to Schematics > Insert Connector and select the desired connector from the options.
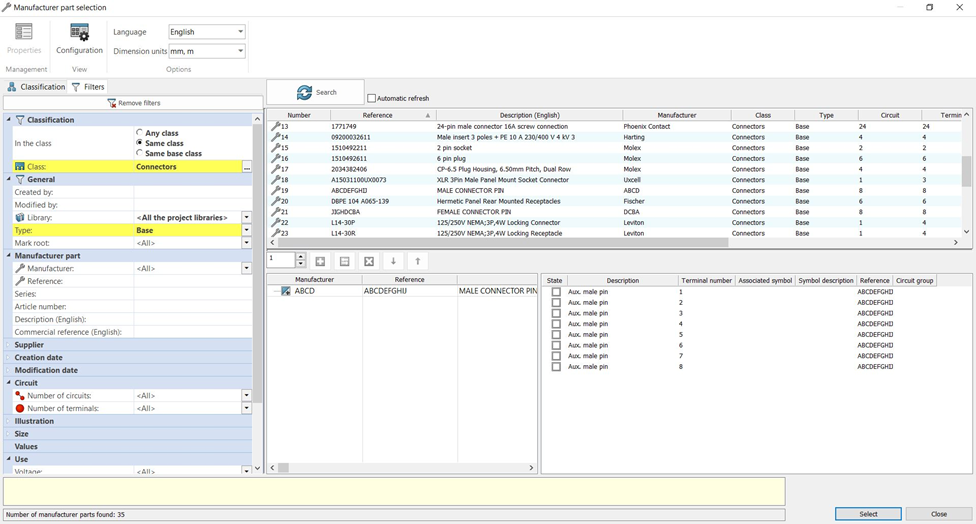
Step 8: Selecting the Manufacturer
A Manufacturer Part Selection tab will appear. Choose the manufacturer based on your circuit and terminal requirements.
The library will display your newly added manufacturer for selection. You can also use filter options to easily find the correct manufacturer.
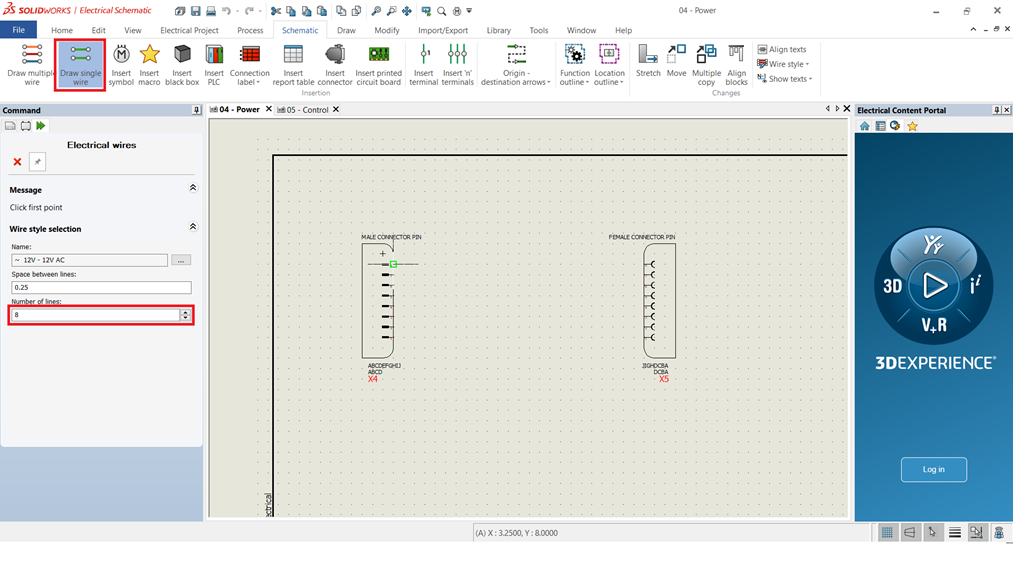
Step 9: Inserting Components and Wires
After selecting the manufacturer, insert the component and choose the wires you want to connect.
You can insert single or multiple wires by adjusting the number of lines on the left side of the window. We can also adjusted the wire spacing.
Conclusion
By following these steps, you can create custom connectors in SOLIDWORKS Electrical and use them to connect components in your schematics. These connectors will be stored in your library for future use.