
Managing Reference Component Revisions in 3DEXPERIENCE SOLIDWORKS
This blog post explains how to revise components within the SOLIDWORKS My Session Task Pane of the 3DEXPERIENCE platform. It covers the different approaches available and clarifies how to handle situations where reference components appear outdated.
This lesson demonstrates the many approaches to revising these components.
Challenges with Updating Downloaded Assemblies
When you download an assembly from the 3DEXPERIENCE platform and then update its reference components, those components might still show up in the Task Pane with the previous revision. This lesson will guide you through various methods to revise these components effectively.
Updating Individual Components
There are two main ways to update individual components:
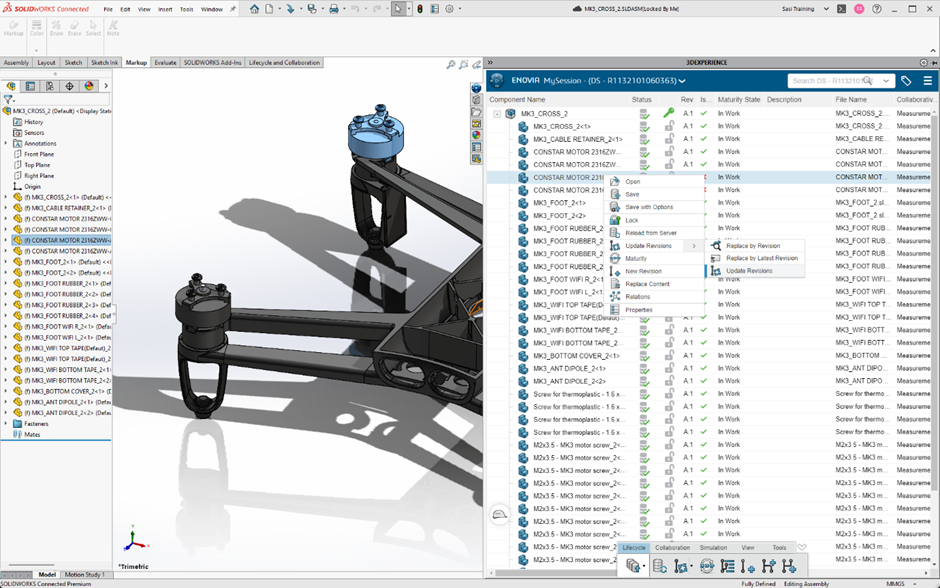
- Replace by Revision: Right-click a component in the Task Pane that has a newer revision available. Select “Replace by Revision” from the menu. This brings up a dialog box showcasing all compatible revisions for that component.
- Latest Revision: This option replaces the component with its most recent revision.
- Important Note: This functionality only works for components that have child references (components with derived parts or contextual connections).
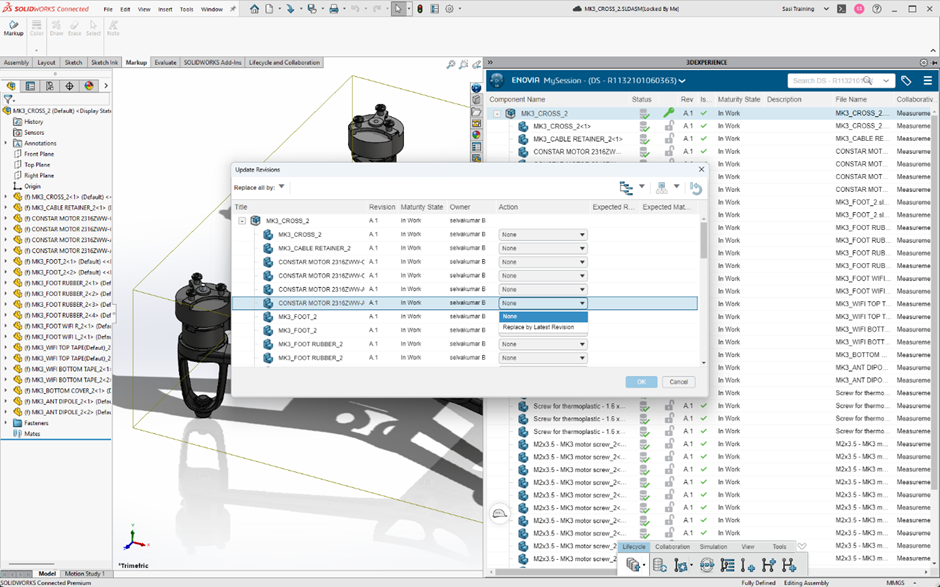
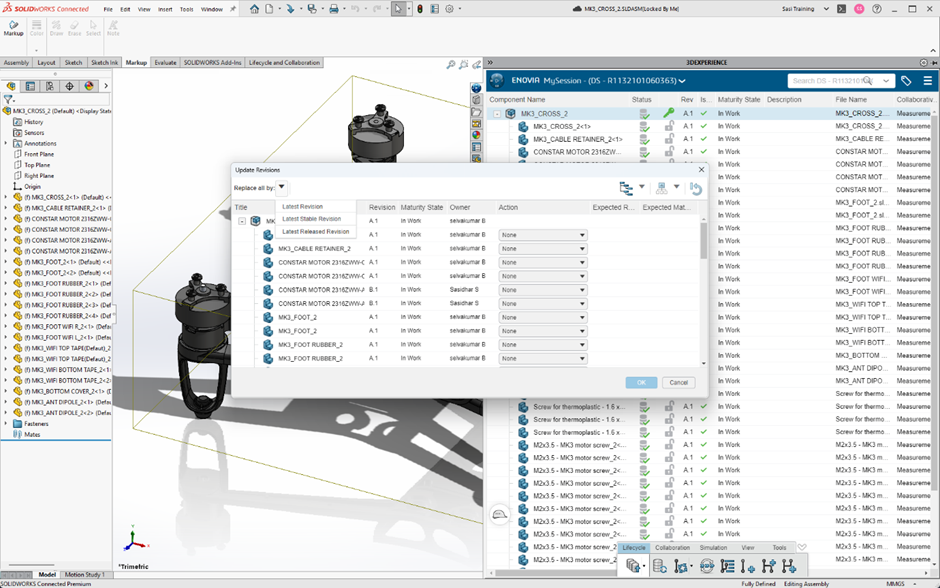
2. Update Revisions in Top-Level Assembly: Selecting “Update Revision” on a top-level assembly offers a more streamlined approach. This action triggers a dialog box displaying the entire assembly structure. Next to each component, a drop-down list appears, allowing you to efficiently select the latest revision for multiple components simultaneously. This eliminates the need to update revisions one by one.
Important Considerations During Updates:
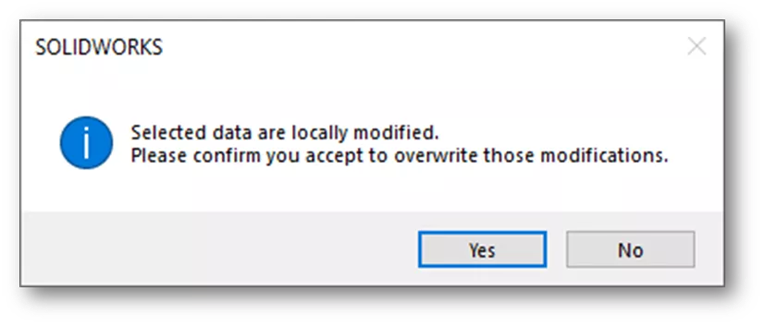
Warning Message: When replacing a file with a different revision while it still shows as updated in the Task Pane, a warning message will pop up. This message informs you that any local changes made to the file will be overwritten. It’s recommended to back up your data beforehand if necessary.
Latest Revisions Update:
Selecting the “Update Revision” option on a top-level assembly streamlines the process. Consequently, a dialog box will appear, conveniently displaying the entire assembly structure. Furthermore, a drop-down list will be available next to each component, allowing you to efficiently link the most recent revisions of multiple components simultaneously. This eliminates the need to update each revision individually, as previously mentioned.
- Replacing a component with the most recent revision available.
- Replacing a component with the most recent stable revision takes it back to its most recent frozen or released lifecycle stage.
- Replace with Most Recent Released Revision: Replace a component exclusively with the most recent revision to be made public.
Note: The option Replace by Latest Revision will be the only one available if there are only unreleased versions.
Updating All Components to Latest Revision
If you want to update all components within an assembly to their latest revisions at once, you don’t need to use the drop-down menu for each component individually.
Simply select “Replace All” from the top right corner of the dialog box that appears when you choose “Update Revision” on the top-level assembly. This will instantly update all components to their most recent versions.
Additional Resources
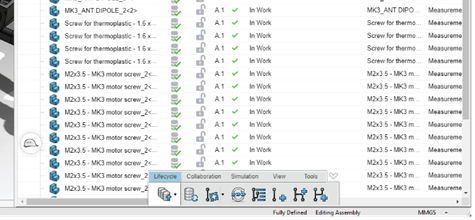
You can find all the settings mentioned above within the Lifecycle tab located at the bottom of the My Session Task Pane.
This concludes the lesson on updating revisions in SOLIDWORKS My Session Task Pane. If you’d like to learn more about the 3DEXPERIENCE platform and SOLIDWORKS, explore the articles provided below.