Search

Collaborative Lifecycle Management :How to access the Collaborative Lifecycle role in order to build revision management

Imagine a world where managing revisions for your 3D projects is a breeze. No more confusion over version numbers or lost updates. This is the power of Collaborative Lifecycle Management (CLM) within the Open 3D Experience Platform. CLM empowers you to track changes, create branches, and effortlessly merge revisions, all while fostering seamless collaboration throughout your design process.

Harnessing the Power of Collaborative Lifecycle Management:

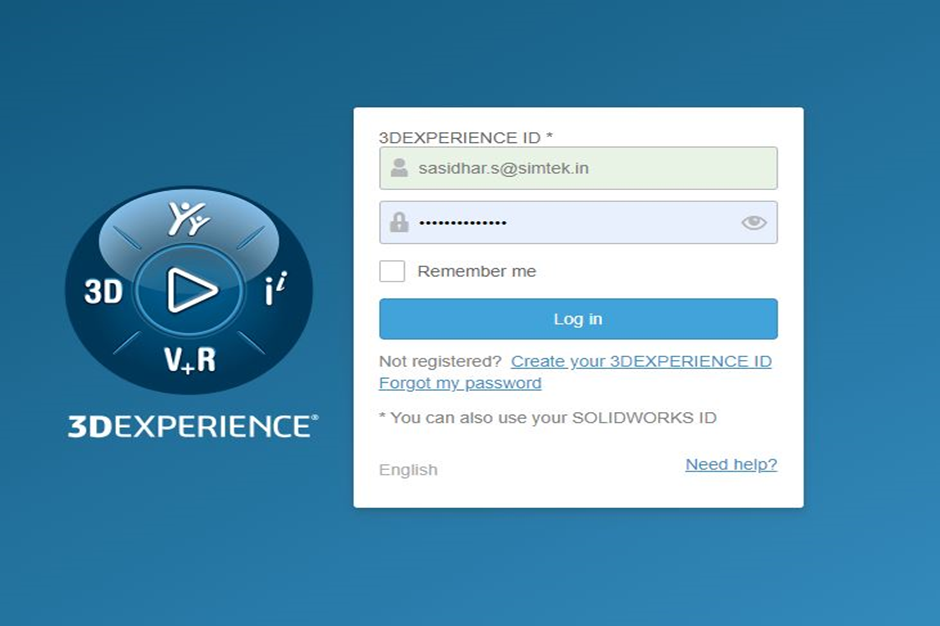
The Open 3D Experience Platform offers a robust set of tools accessible through Google Chrome. By leveraging your 3D Passport credentials, you can unlock the full potential of CLM. Here's a step-by-step guide to get you started:

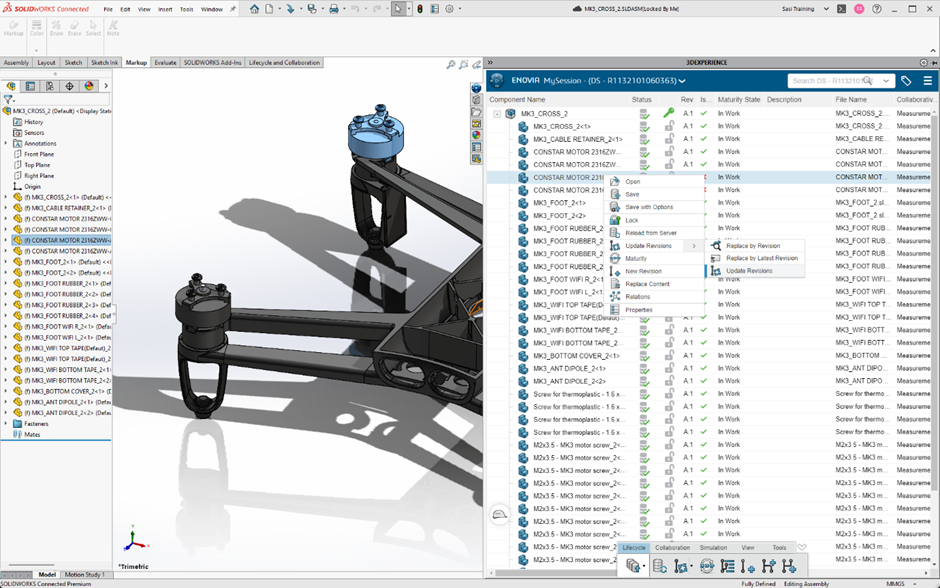
1. Access the Collaborative Industry Innovator Role:

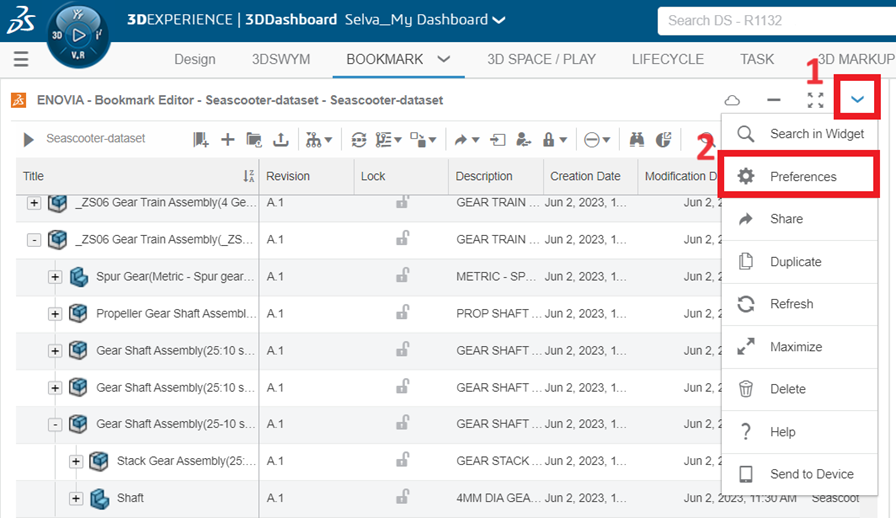
Upon logging in, navigate to the Compass icon. This will grant you access to the Collaborative Industry Innovator role, where you'll find the CLM app.

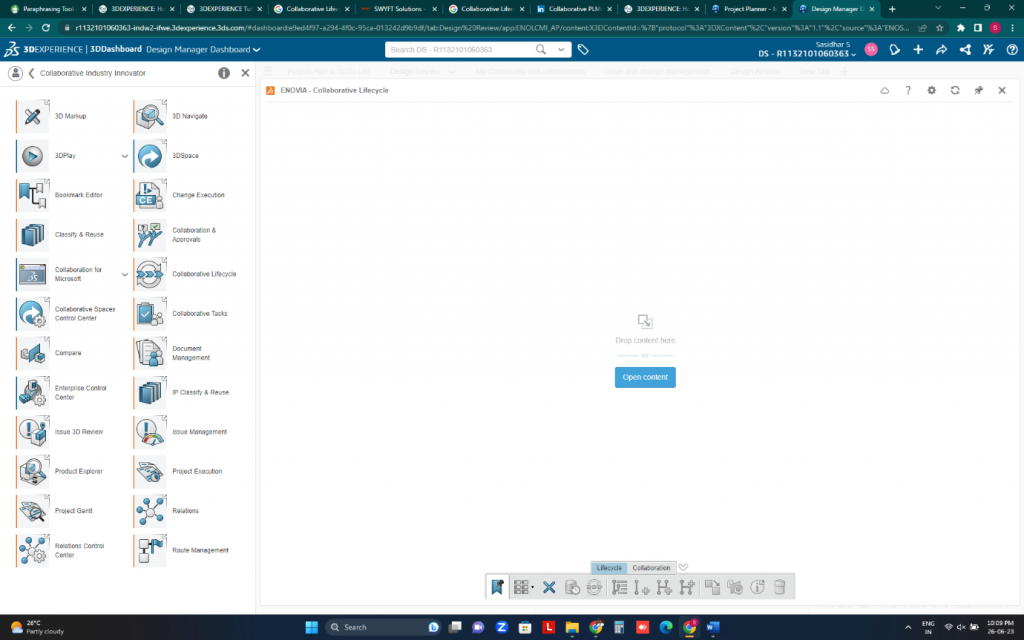
2. Launch the Collaborative Lifecycle App:

Double-clicking the CLM app icon will launch it within the platform.

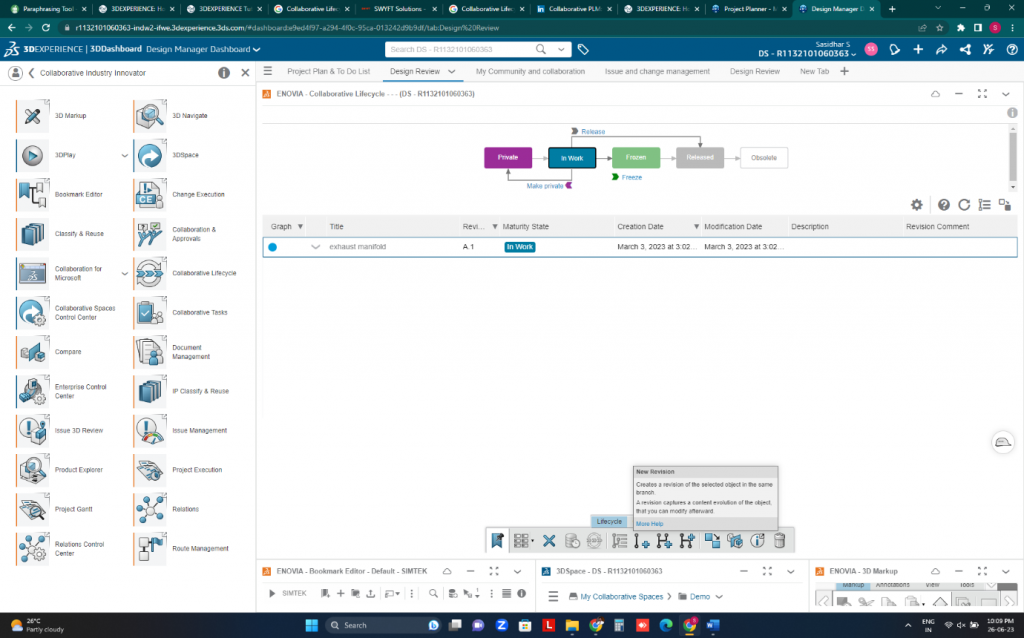
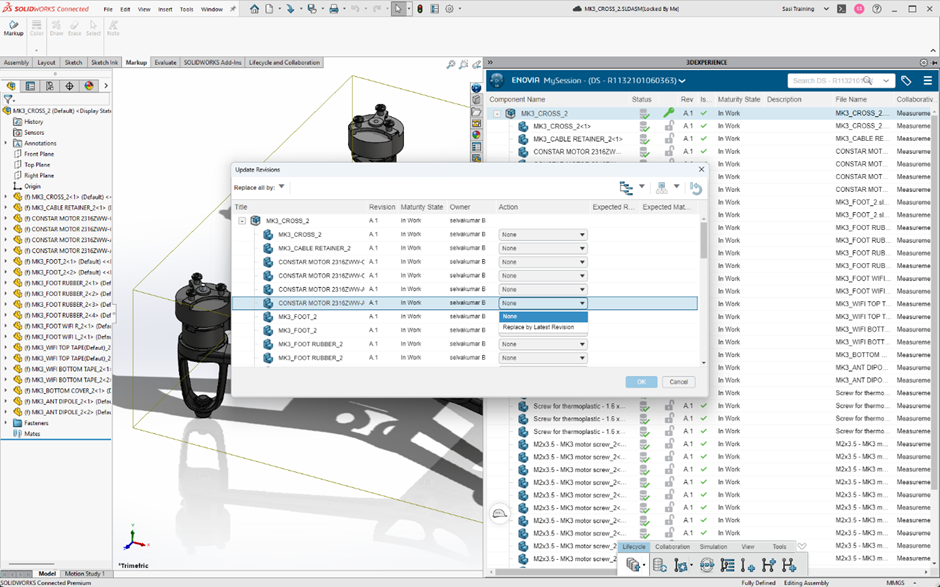
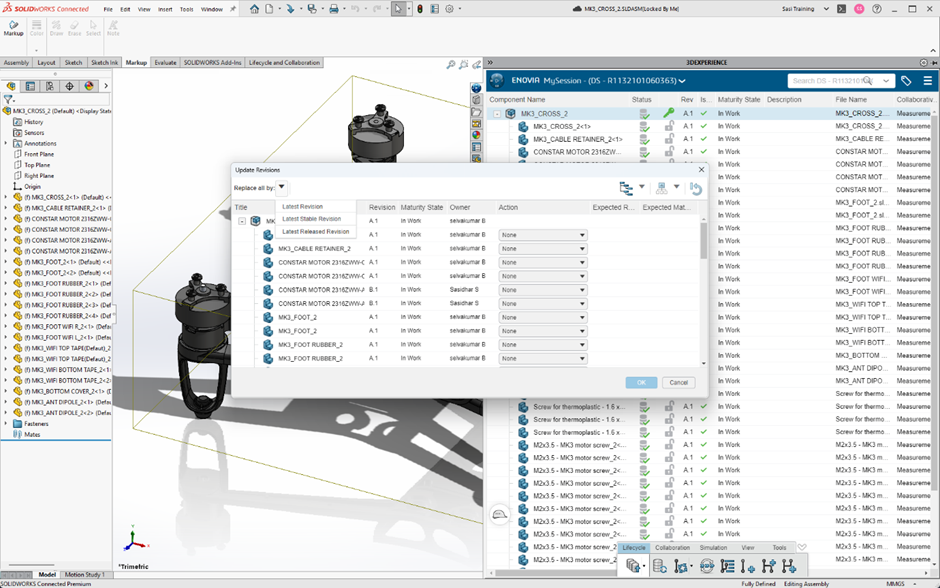
3. Open Your Model and Initiate Revisions:

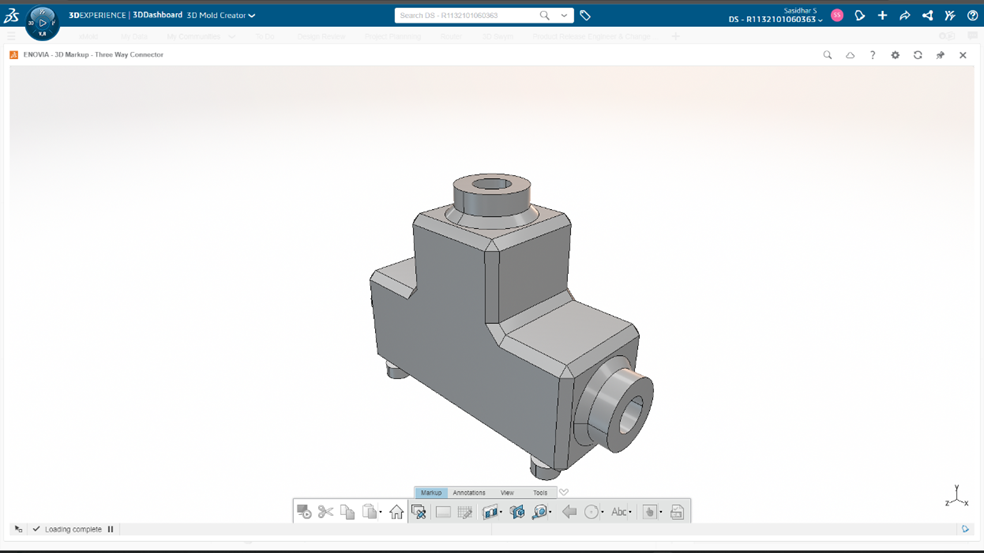
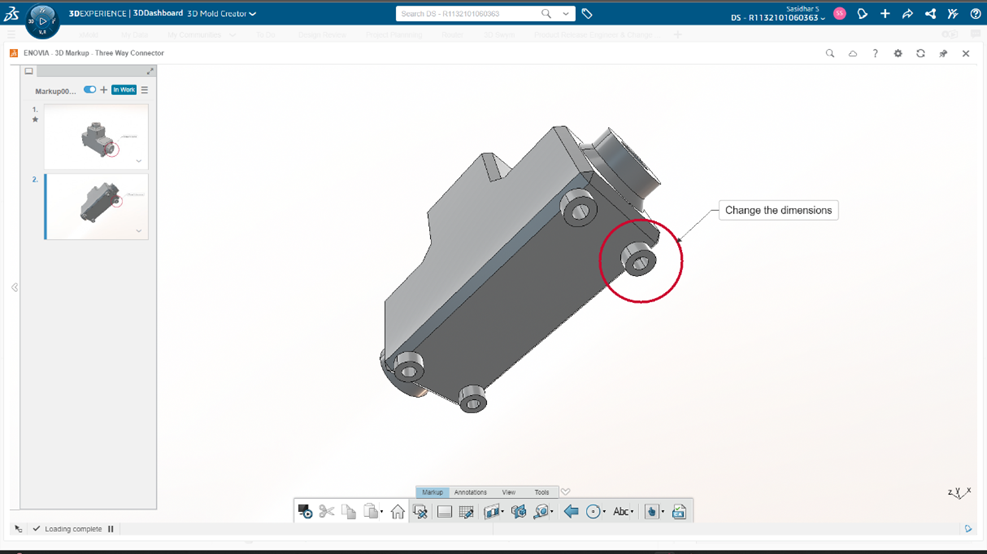
Select your desired model within the 3D space and open it within the CLM interface. This will initiate a new conversation for the updated revision.

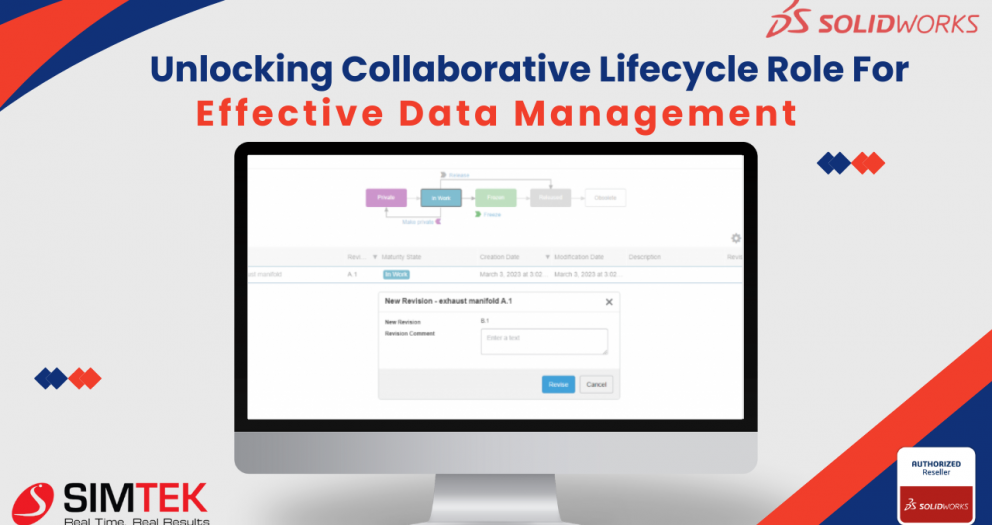
4. Provide Revision Details:

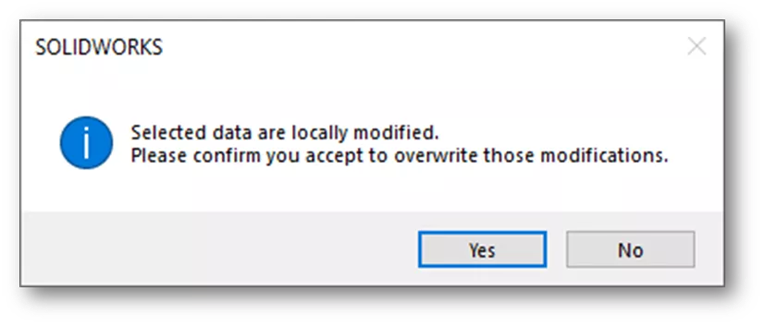
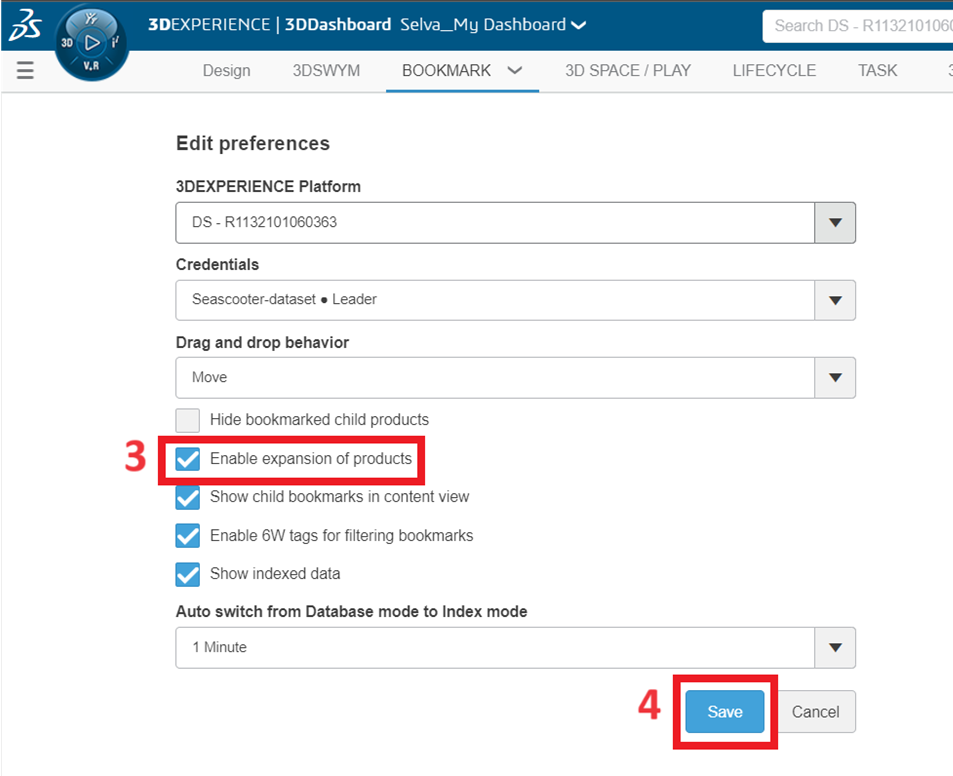
This is where you can clearly document any changes made to the model. A detailed revision history is key for maintaining transparency and efficient collaboration.

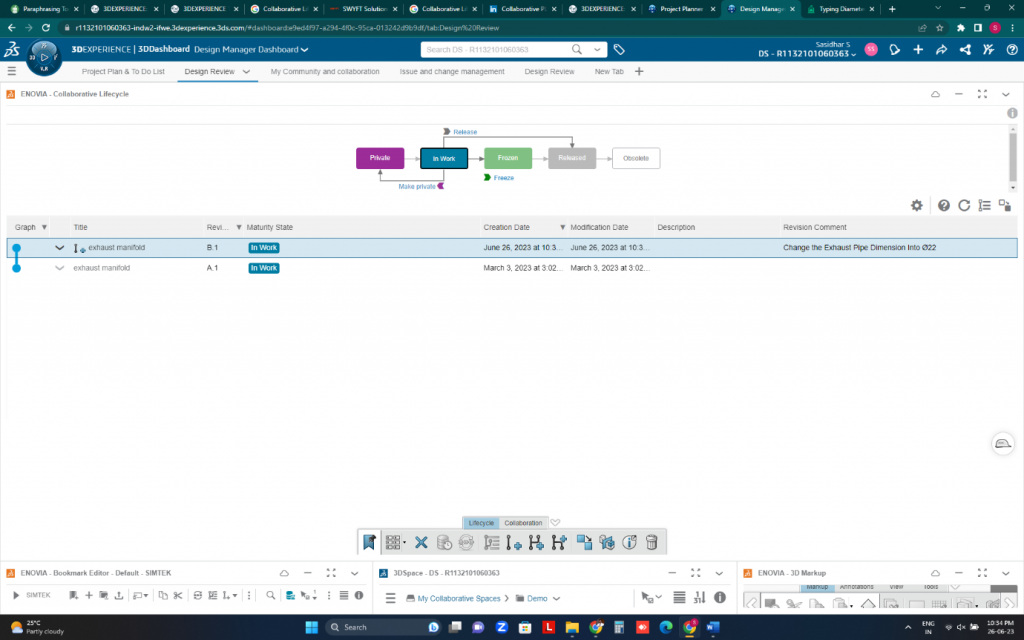
5. Finalize the Revision:

Once you've documented the revision details, simply click "Revise" to commit the changes and update the file revision.

Beyond the Basics: Unlocking the Full Potential of CLM

While the above steps provide a foundational understanding of CLM, its capabilities extend far beyond basic revision control. This powerful tool allows you to:

  • Create and Manage Branches: Facilitate parallel development by creating separate branches for different design iterations. This enables exploration of alternative concepts without jeopardizing the core model.
  • Effortless Merging: Seamlessly integrate changes from various branches back into the main model, ensuring all team members are working with the most up-to-date version.
  • Enhanced Collaboration: CLM fosters a collaborative environment by providing a clear historical record of changes, revisions, and contributors. This promotes transparency and streamlines communication within your design team.

Conclusion

By incorporating Collaborative Lifecycle Management into your workflow, you can revolutionize the way you manage revisions and propel your 3D design projects to new heights. With its intuitive interface and comprehensive features, CLM empowers you to maintain control, streamline collaboration, and unlock the full potential of your design vision.

3DEXPERIENCE Exchange – Import and Export Package

3DEXPERIENCE Exchange

Let us see how we can Import and Export Package with 3DEXPERIENCE Exchange.

Collaborating together with users outside of your company has always been better! Assembly files can be easily bundled into a single package file by using the Export as a Package capability. You can share this file with third-party suppliers so you can track and get back their modifications. Even the files that are editable within the package can be restricted.

Similar to SOLIDWORKS Pack and Go, but with more ease of use as well as integration with 3DEXPERIENCE Platform products, is this capability.

How to Export as Package:

1. In 3DEXPERINCE SOLIDWORKS, open the assembly file you would like to share with External Stack Holder.

2. To save, pick Tools from the 3DEXPERIENCE tab on the right, choose Export, and then select Export as Package.

pick Tools from the 3DEXPERIENCE tab on the right

3. On the launch of the export window, you have the option to mark assemblies and components as read-only or editable for whoever you are sharing data with

4. Following that, providing the package a name and choose Export. The 3DEXPERIENCE Platform permits you to save the package file (.sldpkg) locally or to 3DDrive.

the package a name and choose Export

How to Import as Package with 3DEXPERIENCE Exchange for SOLIDWORKS:

1. Initially ensure certain SOLIDWORKS' "3DEXPERIENCE Exchange" Add-in is activated.

Initially ensure certain SOLIDWORKS' "3DEXPERIENCE Exchange" Add-in is activated.

2. Select the 3DEXPERIENCE Exchange tab on task plane, then pick Import Package.

3. To open the ".sldpkg" file that you received, click the "Open" icon in the "Import Package" Window. A working folder will be created when importing this package, and its default path will be taken automatically.

 To open the ".sldpkg" file that you received, click the "Open" icon in the "Import Package" Window. A working folder will be created when importing this package, and its default path will be taken automatically

4. The window on the right will display the files that are read-only or unchanged when the package has been imported.

The window on the right will display the files that are read-only or unchanged when the package has been imported

5. The window on the right will display the files that are read-only or unchanged when the package has been imported.

Export Package:

Once you've decided to send the updated package back to the the sender, select Package, Export. The revised ".sldpkg" file can be saved from here on and forwarded to the 3DEXPERIENCE user you are collaborating with.

Utilizing 3DEXPERIENCE SOLIDWORKS – Revisions Update

Managing Reference Component Revisions in 3DEXPERIENCE SOLIDWORKS

This blog post explains how to revise components within the SOLIDWORKS My Session Task Pane of the 3DEXPERIENCE platform. It covers the different approaches available and clarifies how to handle situations where reference components appear outdated.

This lesson demonstrates the many approaches to revising these components.

Challenges with Updating Downloaded Assemblies

When you download an assembly from the 3DEXPERIENCE platform and then update its reference components, those components might still show up in the Task Pane with the previous revision. This lesson will guide you through various methods to revise these components effectively.

Updating Individual Components

There are two main ways to update individual components:

  1. Replace by Revision: Right-click a component in the Task Pane that has a newer revision available. Select "Replace by Revision" from the menu. This brings up a dialog box showcasing all compatible revisions for that component.
    • Latest Revision: This option replaces the component with its most recent revision.
    • Important Note: This functionality only works for components that have child references (components with derived parts or contextual connections).
My Session Task Pane 3DEXPERIENCE SOLIDWORKS

2. Update Revisions in Top-Level Assembly: Selecting "Update Revision" on a top-level assembly offers a more streamlined approach. This action triggers a dialog box displaying the entire assembly structure. Next to each component, a drop-down list appears, allowing you to efficiently select the latest revision for multiple components simultaneously. This eliminates the need to update revisions one by one.

Important Considerations During Updates:

Warning Message: When replacing a file with a different revision while it still shows as updated in the Task Pane, a warning message will pop up. This message informs you that any local changes made to the file will be overwritten. It's recommended to back up your data beforehand if necessary.

Latest Revisions Update:

Selecting the "Update Revision" option on a top-level assembly streamlines the process. Consequently, a dialog box will appear, conveniently displaying the entire assembly structure. Furthermore, a drop-down list will be available next to each component, allowing you to efficiently link the most recent revisions of multiple components simultaneously. This eliminates the need to update each revision individually, as previously mentioned.

  1. Replacing a component with the most recent revision available.
  2. Replacing a component with the most recent stable revision takes it back to its most recent frozen or released lifecycle stage.
  3. Replace with Most Recent Released Revision: Replace a component exclusively with the most recent revision to be made public.

Note: The option Replace by Latest Revision will be the only one available if there are only unreleased versions.


 3DEXPERIENCE SOLIDWORKS

Updating All Components to Latest Revision

If you want to update all components within an assembly to their latest revisions at once, you don't need to use the drop-down menu for each component individually.

Simply select "Replace All" from the top right corner of the dialog box that appears when you choose "Update Revision" on the top-level assembly. This will instantly update all components to their most recent versions.

My Session Task Pane

Additional Resources

You can find all the settings mentioned above within the Lifecycle tab located at the bottom of the My Session Task Pane.

This concludes the lesson on updating revisions in SOLIDWORKS My Session Task Pane. If you'd like to learn more about the 3DEXPERIENCE platform and SOLIDWORKS, explore the articles provided below.

Bookmark Editor On The 3DEXPERIENCE Platform

In 3DEXPERIENCE platform, the Bookmark Editor empowers you to streamline cloud data organization and management. Imagine creating a personalized filing system based on projects, departments, products, or any other criteria that suits your workflow. This blog post delves into four key tips to unlock the full potential of the Bookmark Editor and transform your data management experience.

  1. Customise the columns on your bookmark editor.
  2. Enable Product Expansion.
  3. Remove File vs Delete File.
  4. Index and Authoring in Active Mode.

1. Customize the columns on your bookmark editor:

The Bookmark Editor displays a wealth of information about each file within its top row columns. These columns are instrumental in organizing and managing your data effectively. Tailor these columns to your specific needs by dragging and dropping them for rearrangement and selecting which ones to display.

Pro Tip: Right-click any column header and choose "Tree List View Options" to manage column visibility. This menu allows you to select the specific columns you want to display (Step 2). For even more granular control, click the settings gear in the upper right corner (Step 3) and navigate to "More Attributes" followed by "Select Attributes" (Step 4 & Step 5) to add even more columns.

2. Leverage Product Expansion for Effortless Navigation

Subassemblies and subcomponents become a breeze to navigate with product expansion enabled. Simply access the drop-down menu in the upper right corner of your Bookmark Editor Widget (Step 1) and select "Preferences" (Step 2)

. Next, activate the checkbox labelled "Enable product expansion" (Step 3). This will add a plus sign (+) to your files, allowing you to expand them and effortlessly view sub-components.

3. Understanding Remove vs. Delete: Keep Your Data Organized

The Bookmark Editor of 3DEXPERIENCE Platform offers two options for file management: Remove and Delete. It's crucial to understand the distinction between these two functions.

  • Remove: This action removes the selected file from the current Bookmark only. The file itself remains within the Collaborative Space where it was originally saved and can still be accessed through other Bookmarks.
  • Delete: This permanent action removes the selected file from your entire Platform. Use this option with caution, as deleted files cannot be recovered.

4. Switch Between Indexing and Authoring Modes for Real-time Updates

The Bookmark Editor offers two viewing modes: Indexing and Authoring. Indexing mode, the default setting, displays the latest items available from the server's database. However, there might be a slight delay in reflecting recent modifications or uploads due to the indexing process.

To view the most up-to-date changes, switch to Authoring mode. This mode allows you to see any files still being indexed. Keep in mind that the window will automatically revert to Indexing mode after a minute in Authoring mode, unless you adjust this behavior in the Preferences.

Unleash the Power of the Bookmark Editor

By incorporating these essential tips, you can transform the Bookmark Editor into a powerful tool for managing your cloud data within the 3DEXPERIENCE platform. From customized column views to seamless navigation and control over file management, the Bookmark Editor empowers you to organize and access your data with greater efficiency.

How To Create 3D Markup With The Help Of 3DEXEPERIENCE Platform

In today's fast-paced design environment, clear and efficient communication is paramount. Imagine a world where highlighting design issues, sharing feedback, and collaborating with colleagues becomes effortless.

This is the power of 3D Markup within the innovative 3DEXPERIENCE platform. It empowers users to streamline the review process, eliminate communication roadblocks, and foster seamless collaboration throughout the design cycle.

This blog post will guide you through the creation and utilization of 3D Markups, allowing you to leverage the full potential of this valuable tool within the 3DEXPERIENCE platform.

Get ready to revolutionize the way you communicate design ideas and dramatically improve project efficiency!

Accessing 3D Markup:

Before diving into creating markups, let's explore how to access the 3D Markup application within the 3DEXPERIENCE platform:

  1. Open the 3DEXPERIENCE Platform: Head to Google Chrome and launch the 3DEXPERIENCE platform webpage.
  2. Login with your Credentials: Use your 3D Passport login credentials to access the platform.
  3. Finding 3D Markup: There are two ways to access 3D Markup. You can either open it directly from the Compass icon or drag it to your dashboard for easy future access.

Creating a New Markup:

Now that you've accessed 3D Markup, let's create a new markup to highlight design elements and communicate your ideas:

  1. Initiate a New Markup: Within the Markup tab, locate and select the "Markup" icon to create a fresh markup.
  2. Select Your File: It allows you to work with various file types. Choose the component, existing markup, drawing, or any other approved file type you want to annotate.

Enriching Your Markup:

With your file selected, it's time to add value through annotations:

  • Include Notes and Annotations: Clearly communicate your ideas by incorporating essential notes, shapes, or annotations directly onto the 3D model.
  • Save as Slides: Organize your markups for clear and efficient information sharing by saving them as slides.

Additional Features of 3D Markup

3D Markup offers even more functionalities to streamline your design review process:

  • Issues and Change Actions: Facilitate efficient problem-solving by creating Issues and Change Actions directly within the markup.
  • Share with the Community: Capture screenshots of your markups with ease and share them with the 3DSwym community, fostering a platform for exchanging ideas.
  • Seamless Transition to 3DPlay: After adding notes and annotations, simply switch to the 3DPlay application for further analysis while keeping the document active.

Creating Markups Directly from 3DPlay:

Here's a bonus tip: Did you know you can also create markups directly from within 3DPlay? Simply access the "Annotations Commands" icon in the Tools menu of the 3DPlay window to generate annotations similar to those made in It.

By incorporating these steps and exploring the functionalities of 3D Markup, you can significantly enhance communication and collaboration within your design projects.

Back to Top
Product has been added to your cart